How to Implement Undo in a React + Redux Application
How to implement undo functionality in a react + redux web application. This article explains how we designed Kapwing's undo stack with notes on technical design and edge cases. A resource for other web developers adding undo to a browser-based productivity app.

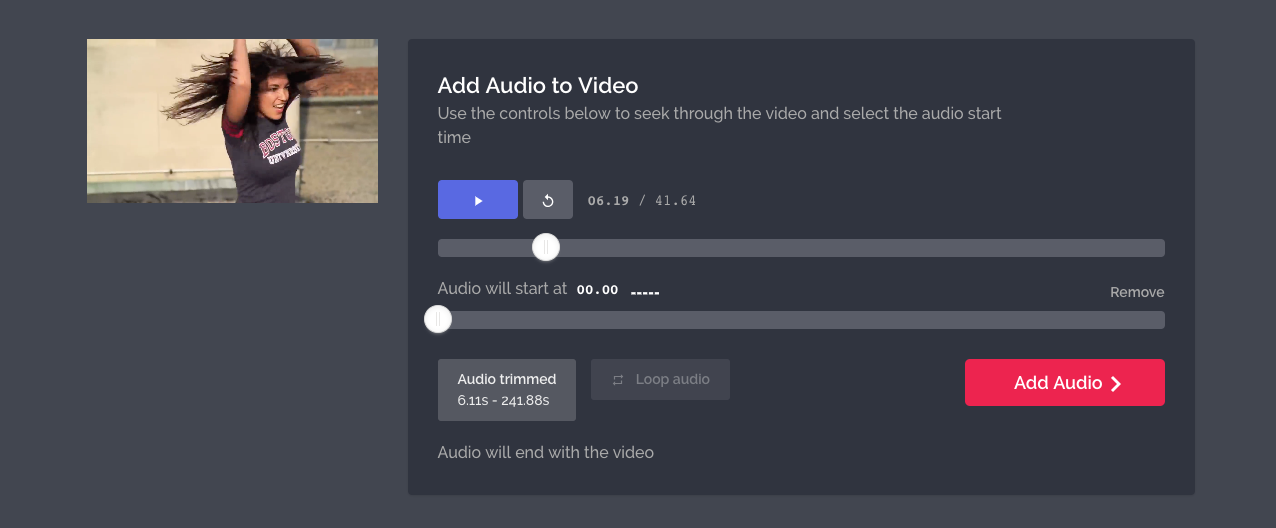
Every engineer at Kapwing has been through the following: We tell a friend that we are empowering creative professionals to make complex videos and images with a super intuitive, browser-based editor. They open up their laptop to take a look, add a video, add text, animate the text, add audio. They inevitably make an edit they don't like, so they click CTRL-Z ( or in San Francisco CMD-Z ), and nothing happens... “No undo?” Ouch.
Well, enough is enough. We are proud to announce that Kapwing now has undo! In this article, we’ll explain how we designed and implemented undo. Hopefully we will help other web developers wanting to bring undo functionality to their web app.
Background
Kapwing is a web app built on a modern MERN stack that supports making and editing multimedia projects with videos, text, images, audio, subtitles and shapes. All of these things are referred to as ‘layers’ Under the hood each video is a list of scenes, and each scene is itself a list of layers.
New in Kapwing 🚀
— Kapwing (@KapwingApp) July 21, 2020
Undo with CMD + Z or CTRL + Z pic.twitter.com/aTU4lExzbt
Design Considerations
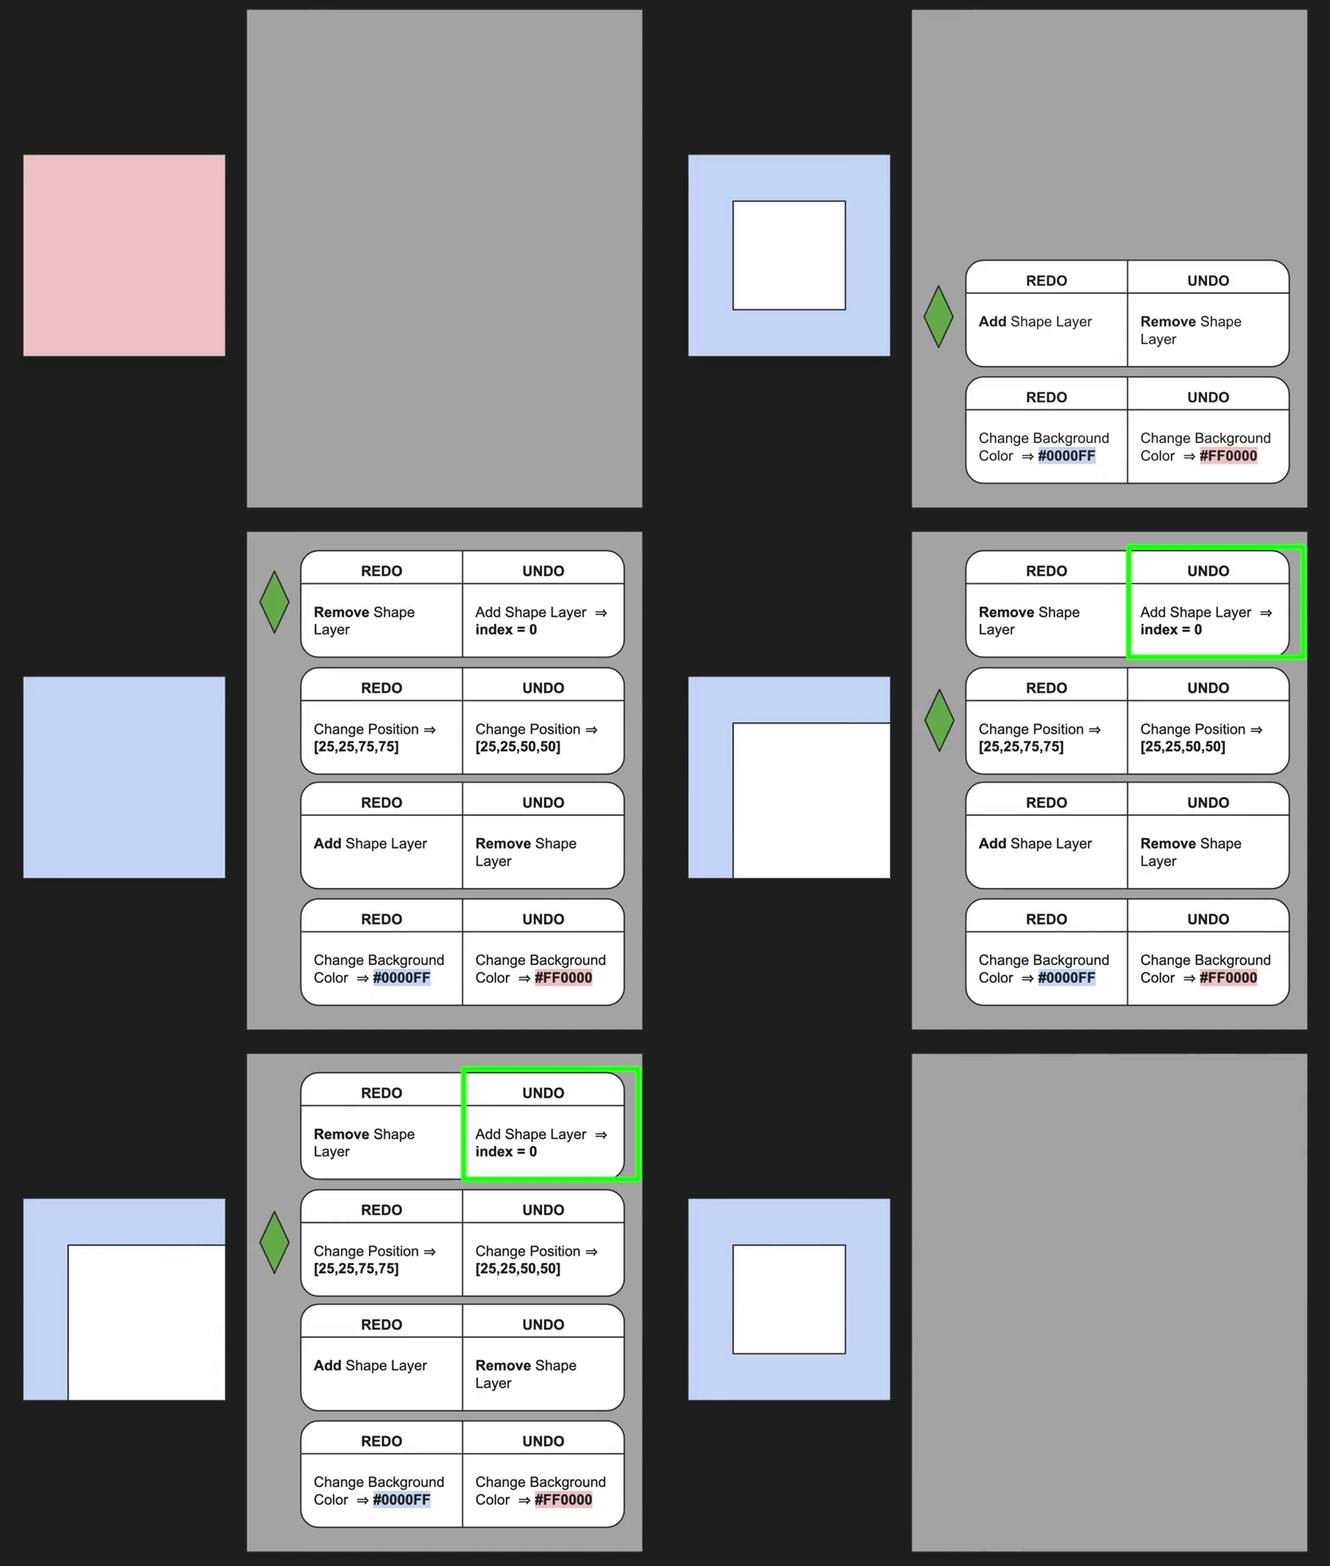
Implementing undo requires an undo stack: an array and a pointer. Clicking undo decrements the pointer, and clicking redo increments the pointer. Performing an undoable action adds an entry to the array, and when the pointer is not at the top of the stack it should also discard all entries above the pointer, as they are no longer ‘redoable’.
An example of an undo stack with a pointer is shown below:

There are generally two approaches to storing the entries of the undo stack:
- Store a snapshot of the application state
- Store two functions: undo and redo
At first glance, Method #1 seems simpler, as we already have our state at the time the action is performed. An application that allows for editing the pixels of a photo, for example, may use this method in the form of object URLs to the photo at the time of the action. Method #2 requires that we code an undo and redo function for every action. For Kapwing, however, Method #1 has a few drawbacks:
- Our app’s state is big. Some of our videos contain dozens of scenes and hundreds of layers. A 100 deep undo stack implemented this way would be a terrible memory hog
- Our app's state can be altered by video playback, navigation, and background tasks (file upload, thumbnail generation etc.). We don’t want this state to be affected by undo/redo.
- Our app supports synchronous collaboration across many devices. The state could update due to a collaborator’s actions, but allowing a user to undo another user's actions seems unintuitive and confusing.
And so we ultimately decided to go with Method #2. Each stack entry would be an object with 2 fields: undo and redo.
To understand the complexity of this approach, I'll outline a few things about state management in our app and in most modern React/Redux web applications:
- Our global state is managed by redux. Kapwing has synchronous collaboration and autosave, which means that most calls to redux also get sent over the network to our db. As a result, calls to redux are somewhat expensive.
- A user action does not necessarily map to a redux action. In order to reduce expensive redux actions mentioned above, we often rely on local component state and don’t update the global state until after the user confirms their options. Layout is often updated by the local component state, not global redux state.
- A user action can map to multiple redux actions and multiple local state updates. For example, adding, removing, or trimming a video can change the duration of the entire project in addition to changing the properties of that layer. Timing a subtitle causes playback to skip to the new start time. All of these side effects must also occur during undo/redo.
Given the above considerations, we decided to take a flexible approach where undo/redo can be objects or functions. If they are objects, then the object will be dispatched to our reducer. If they are functions, then this function will be executed on undo/redo. In both cases, the pointer is updated accordingly.
Undoable Flag
When a programmer dispatches an action that they’d like to be undoable, they must pass in the argument undoable=true. The undoable flag is needed for a few reasons:
- Performing Undo/Redo itself should not alter the undo stack. It should simply perform actions and increment/decrement the stack pointer. Hence all actions dispatched by undo/redo have undoable=false.
- Many redux actions are dispatched in the background, and the user cannot undo these actions. For example, when a video finishes uploading, we update the source/url in the background, but the user should not be able to revert that layer update. This layer update is therefore not undoable.
- When a user action maps to multiple redux actions/local state updates, the undo/redo fields will be functions rather than objects to dispatch. Hence the undo stack must be appended in a local component, not the global reducer.
- Some components already have native undo/redo, like content editable components, so these can be excluded from the undo stack.
Implementation Examples
I will outline two examples of how we implemented undo on Kapwing. One is extremely simple; we implement undo in the reducer, which pushes dispatchable objects onto the stack with little additional code. The other is more complex; component developers must add functions to the undo stack themselves in order to properly update local state.
Simple: Background color
Background color is determined either by a menu of buttons or a hex text input. The selection has no effect on playback, project duration, or any other field. The logic for making this undoable can hence be handled entirely by the reducer:
case "SET_BACKGROUND_COLOR":
    if (action.undoable) {
     undoStack.add(
       {
         undo: {
           type: "SET_BACKGROUND_COLOR",
           color: state.color,
         },
         redo: {
           type: "SET_BACKGROUND_COLOR",
           color: action.color,
         },
       },
     );
    }
	return { ...state, color: action.color }
A programmer adding a new background color selector simply has to set undoable=true when dispatching this action.
More complex: Subtitle trimmer
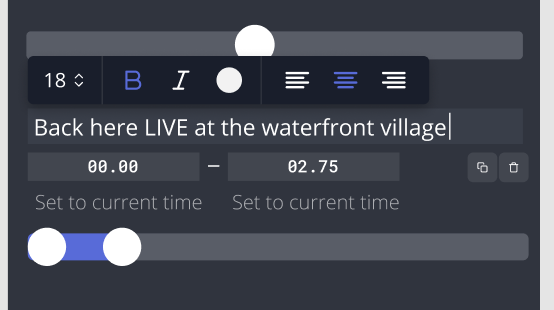
In Kapwing’s Subtitle view, users change the start and end times of a subtitle with a slider. As you drag the slider, the video preview updates so that you can easily find the exact frame where you want your subtitle to start/end. When you undo a trim, you don’t want an undo for every time the drag handler fires -- that would mean a whole lot of CTRL-Zs to undo one drag!
The key is to save off the initial state at the start of the slide and to update redux/undoStack at the end. During the ‘slide’, we only update the local state. This is accomplished by registering these handlers:
    slider.on("start", (startTime, endTime) => {
      this.slideStartValues = { startTime, endTime };
    });

    slider.noUiSlider.on("slide", (startTime, endTime) =>
      this.handleLocalSlider({startTime, endTime})
    );

    slider.on("end", (startTime, endTime) =>
      this.onSubtitleTrimEnd(startTime, endTime)
    );
When the slide ends, we update the global state and add functions to the undo stack:
onSubtitleTrimEnd = (startTime, endTime) => {
  const func = () => updateSubtitle({ startTime, endTime });
  const undoFunc = () => updateSubtitle(this.sliderStartValues);

  func();

  undoStack.add({
    undo: () => {
      if (this.mounted) {
        this.handleLocalSlider(this.sliderStartValues);
      }
      undoFunc();
    },
    redo: () => {
      if (this.mounted) {
        this.handleLocalSlider({startTime, endTime});
      }
      func();
    },
  });
};
updateSubtitle dispatches an action that updates our global redux state. The undo function uses the sliderStartValues instance variable stored in our initial state.
Note that the undo/redo functions only call handleLocalSlider when the subtitles modal is mounted. This updates the local playback to reflect the caption's new start time.
Thus, when the Subtitle View is mounted, undoing a trim will modify global state and also update the local video preview. When the Subtitle View is not mounted, it will simply update global state.
Other considerations
Visibility
If the layout changes, can the user still undo actions they took in a previous view? We don’t want undo to lead to navigation, so we prevent the undo stack pointer from decrementing below when the current view is mounted. These local conditionals add some complexity to the undo logic.

Upload Redo
Kapwing allows users to instantly access their uploaded files by using local blobs until the upload is complete. When the upload completes the layer is modified with the new url. This is the type of ‘non undoable background action’ that was discussed earlier. What then happens if an upload is undone and redone? Should undoing an upload cancel the upload? We do the following:
- We do not cancel upload on undo, but we do delete the corresponding layer.
- The layer is thrown in a deleted layers dictionary in redux.
- When the upload completes, the layer in the deleted layers dictionary is updated with the new url.
- Redoing the action will now add the layer back with its updated remote url.
Text editing
Kapwing is popular for adding subtitles and text to a video, so, like other web applications, we have lots of contenteditable divs on our pages. Contenteditable divs have their own native undo that responds to undo actions while the box is selected.

But what about undo actions performed after the text has been deselected? We handle this in a similar way to how we handle the subtitle trimmer:
- When the text box is selected, the initial state of the text is saved in local state
- The text changes that occur as the user is typing are sent to redux with non-undoable actions
- When the user deselects, the undo stack is populated using the initial state for undo and the final state for redo.
This scheme allows for native undo when typing and for quickly undoing text changes after the text is submitted.
Summary
For browser-based applications, undo gives users more precise control, enables longer-form tasks, and encourages more experimentation since users can try out aspects of the UI without losing their work. Implementing undo/redo in a modern web app is a challenging task. The basics of an undo stack may be simple, but the complexity arises when we try to map user actions to 0,1 or many global/local state updates, and to do so in an intuitive and visible way.
I hope this article helps developers who are planning an undo project to successfully architect their solution. A successful implementation gives users access to a standard expectation for productivity software without slowing down developers.


