How to Make a Custom Notification Sound on Android and iPhone
You can customize ringtones and wallpapers, so why not change the notification sound? Learn how to achieve this in this step-by-step tutorial.
From ringtones to wallpapers, the customization possibilities are nearly endless on iPhones and Androids. Why not customize the notification sound?
Distinct audio helps alerts stand out in busy offices and typically sound better than the default options. With an abundance of free notification sounds available, ranging from popular games to tv shows, it's hard to pass up personalizing this audio. To make this happen, I'll show you how to make custom notification sounds on Androids and iPhones.
How to Make a Custom Notification Sound on Android
Making custom notification sounds for Androids is a straight-forward process. All you need is your phone and few minutes of spare time. Have your video or audio file ready, then follow the steps below to begin.
Step One: Upload Audio or Video to Kapwing Studio
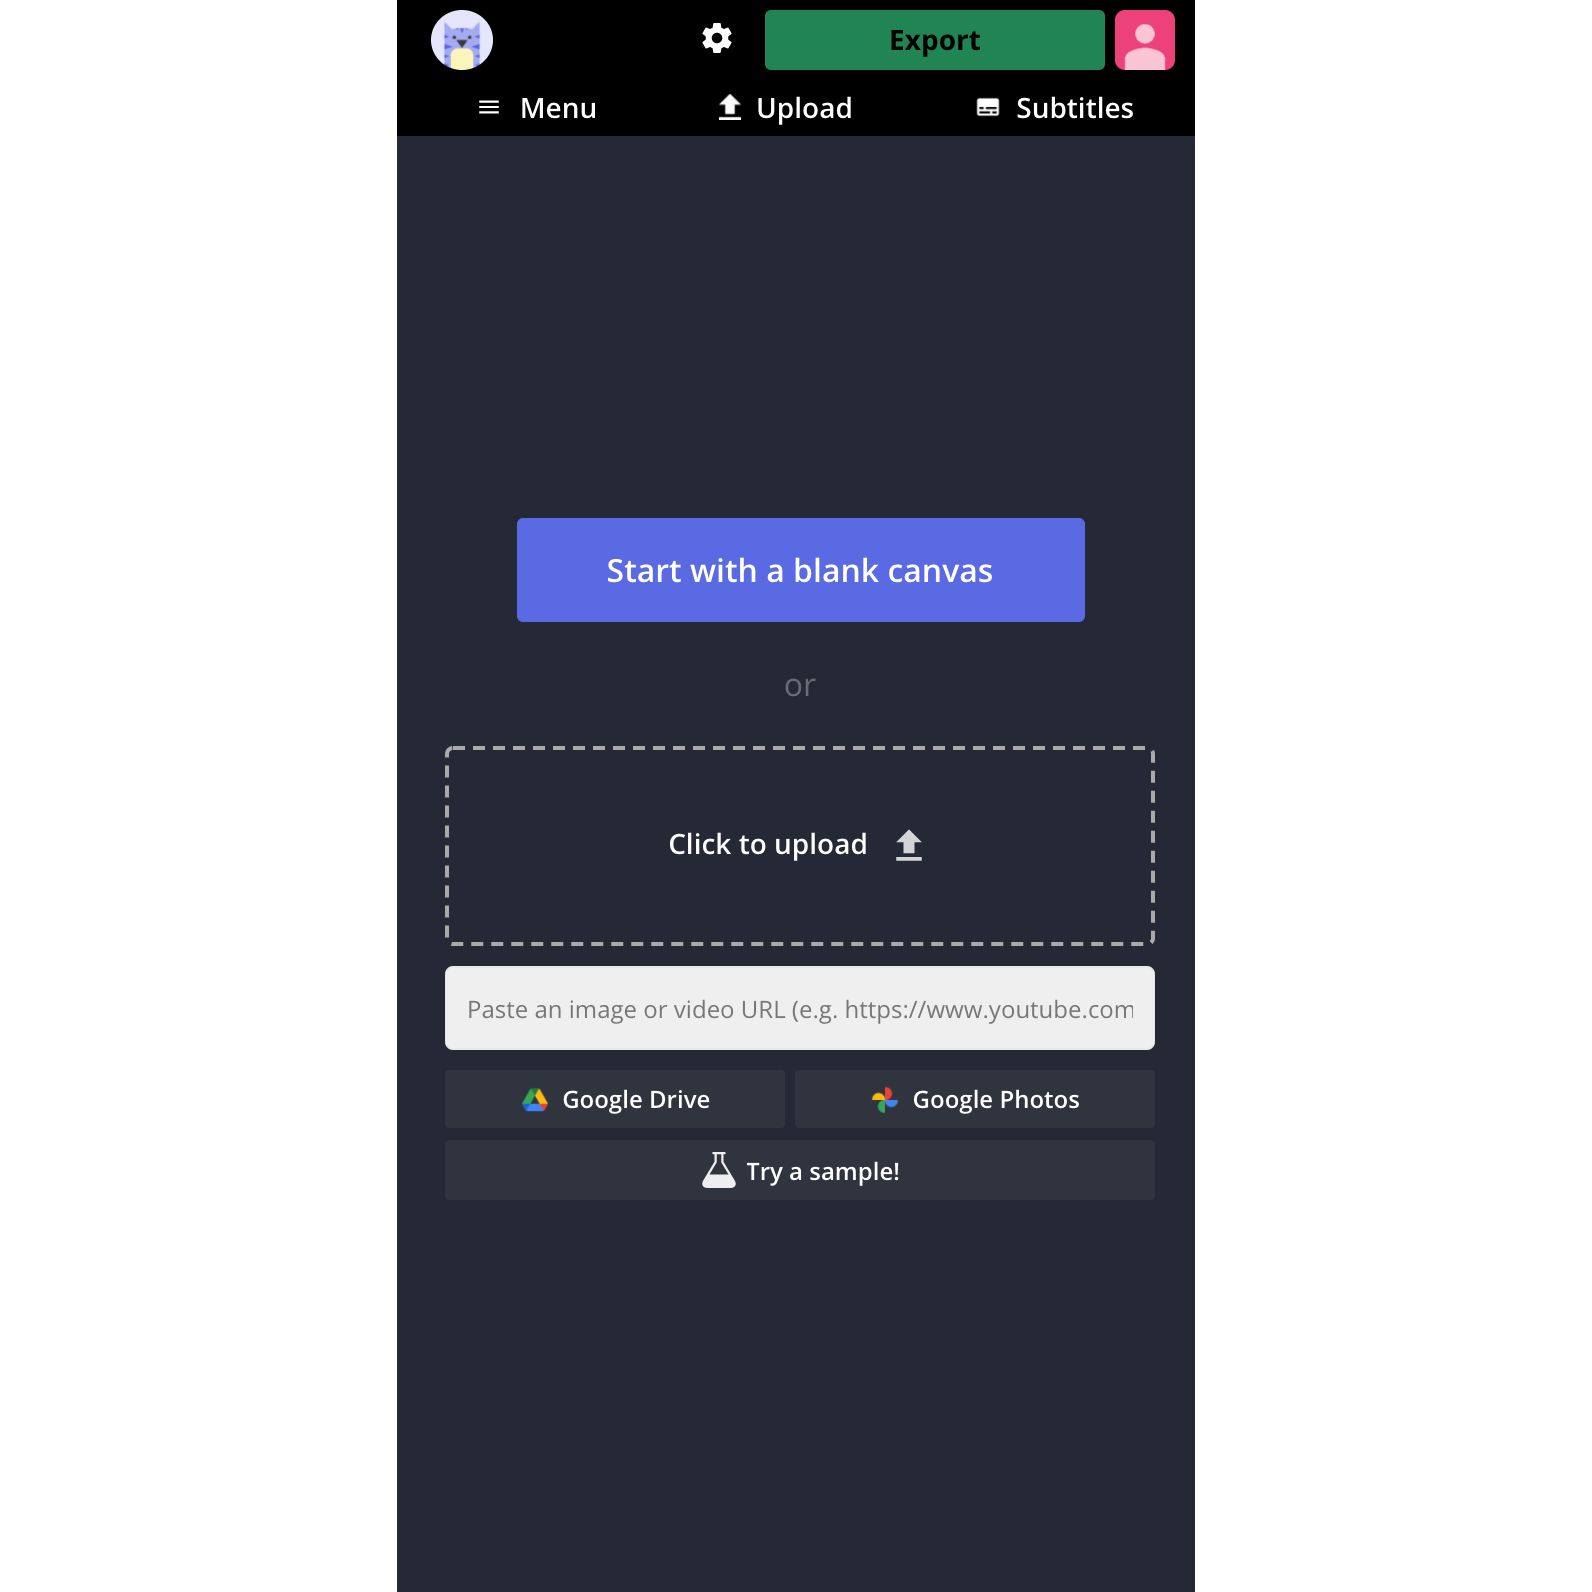
Visit Kapwing and tap Start Editing or Sign in to a Workspace to open the Studio. You can use Kapwing on any device and store and edit content for up to two days for free. Tap Click to Upload or paste a link to add your sound to the Studio.
Step Two: Edit Notification Sound
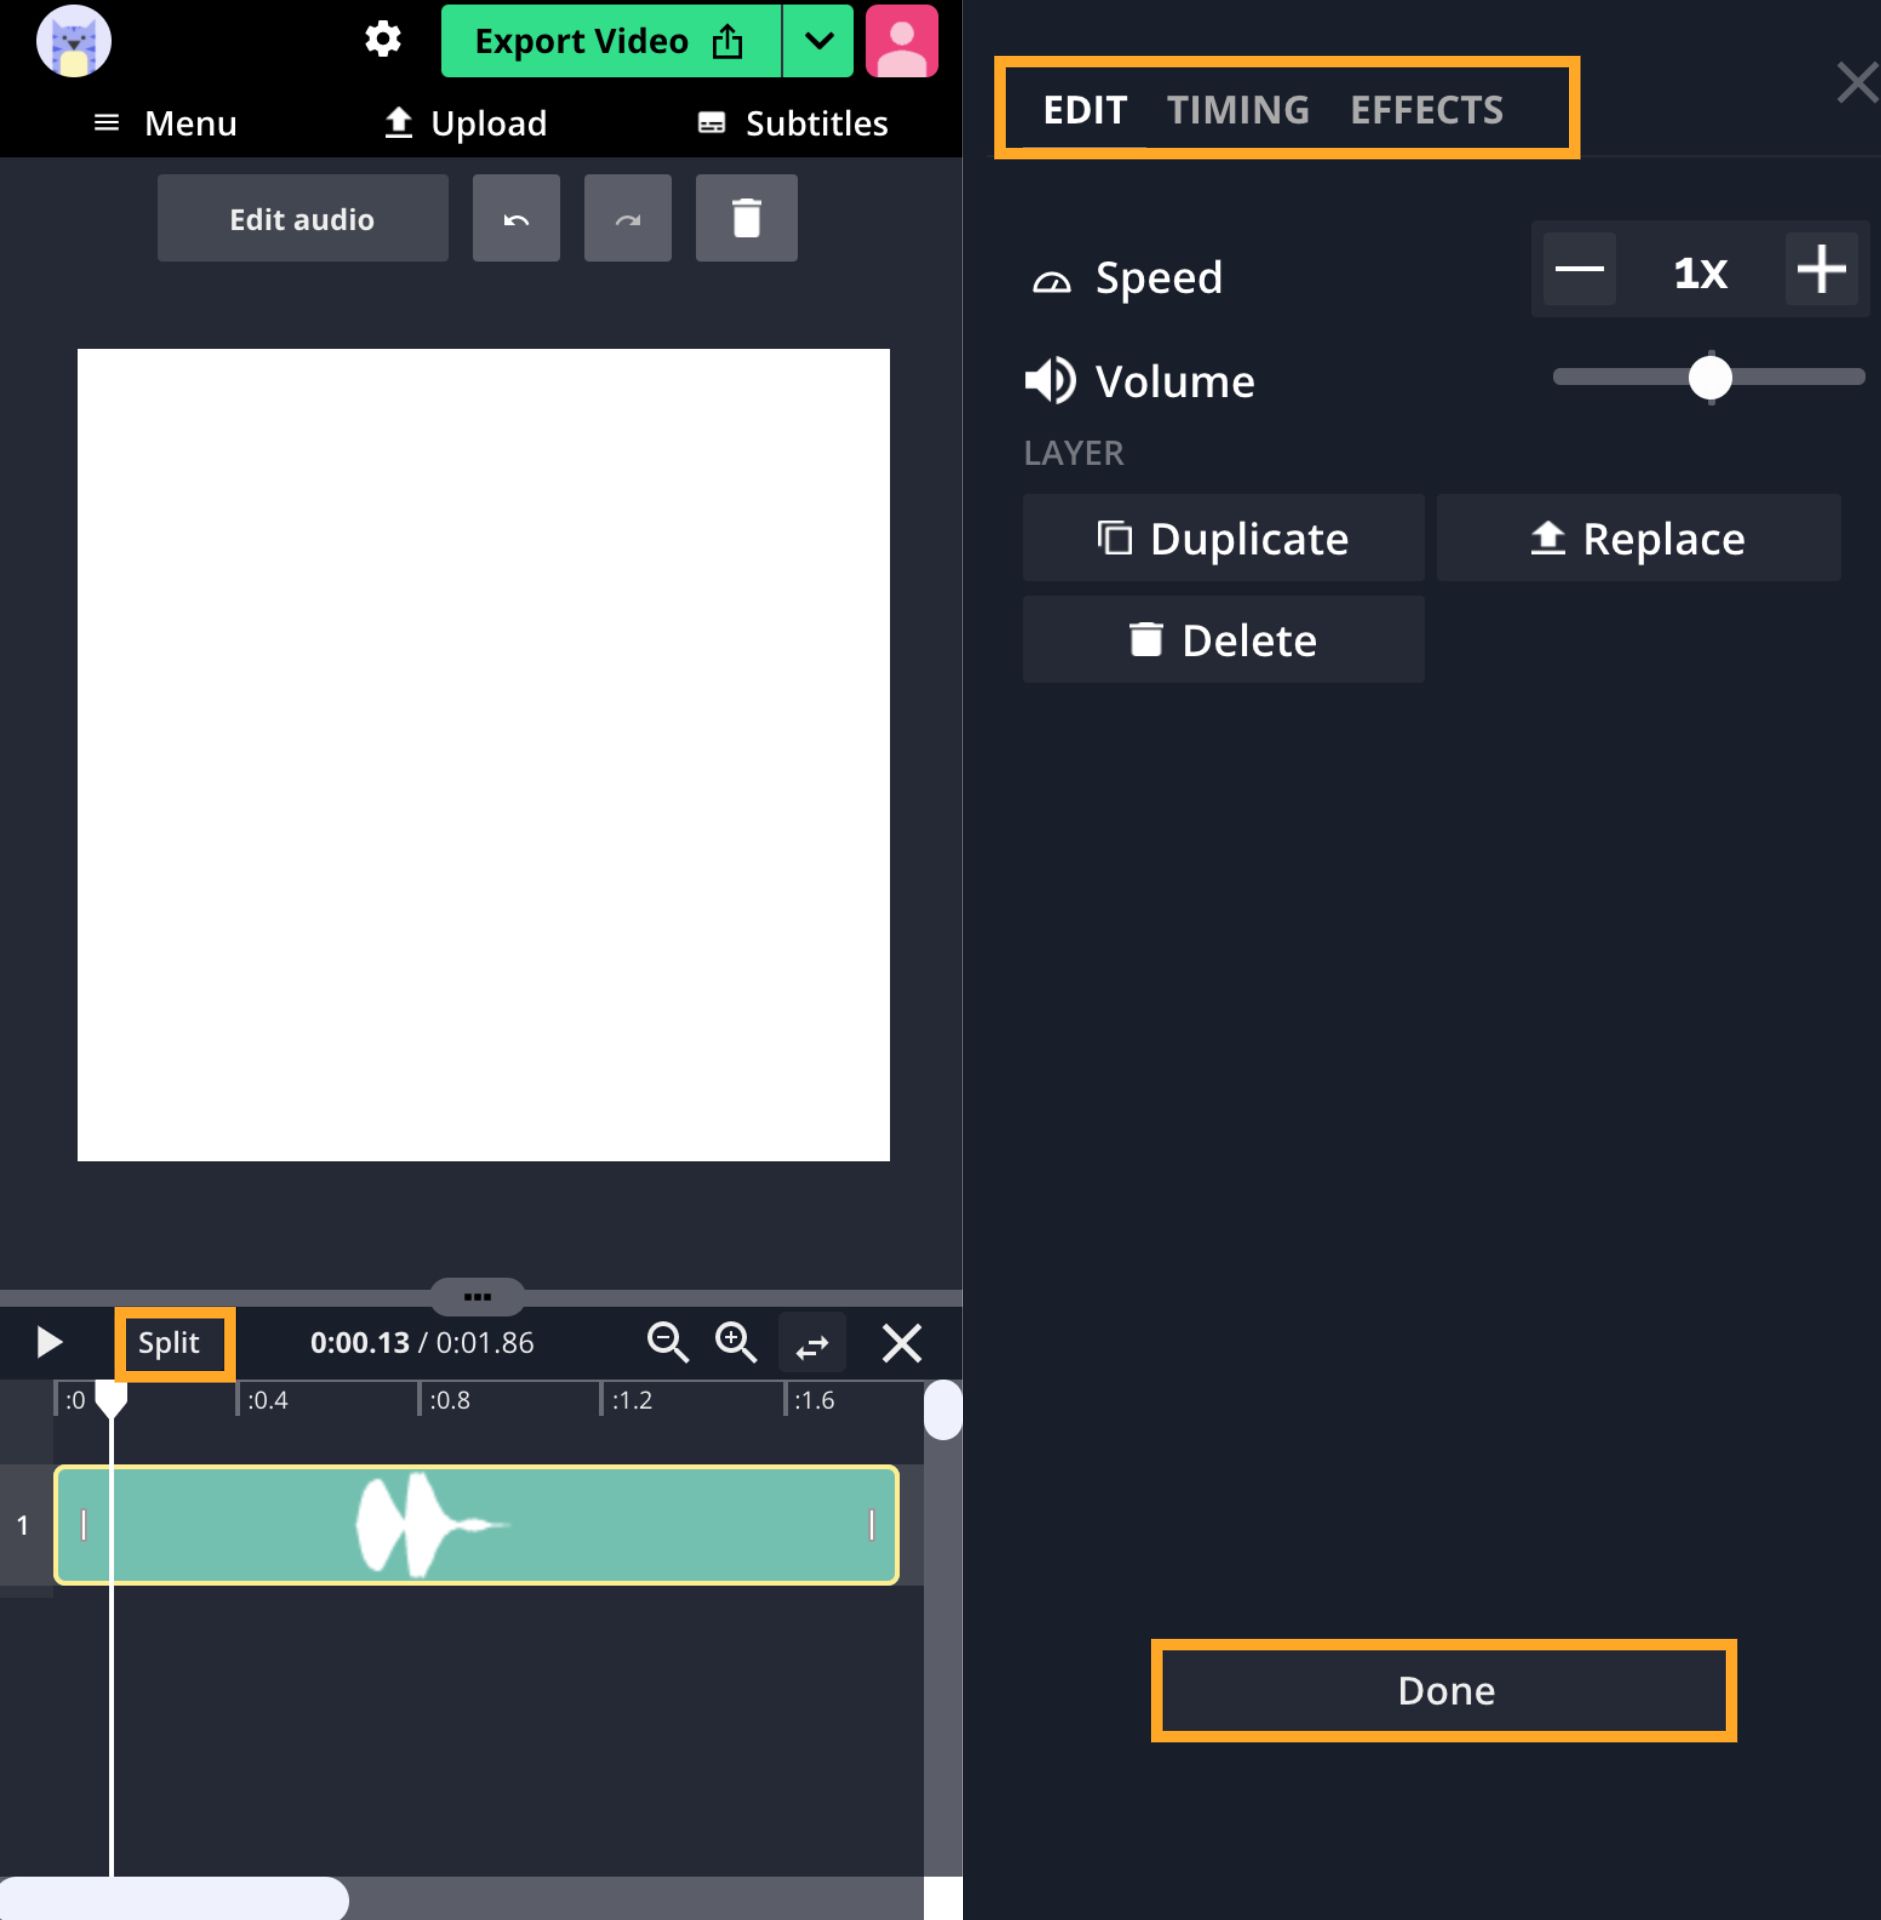
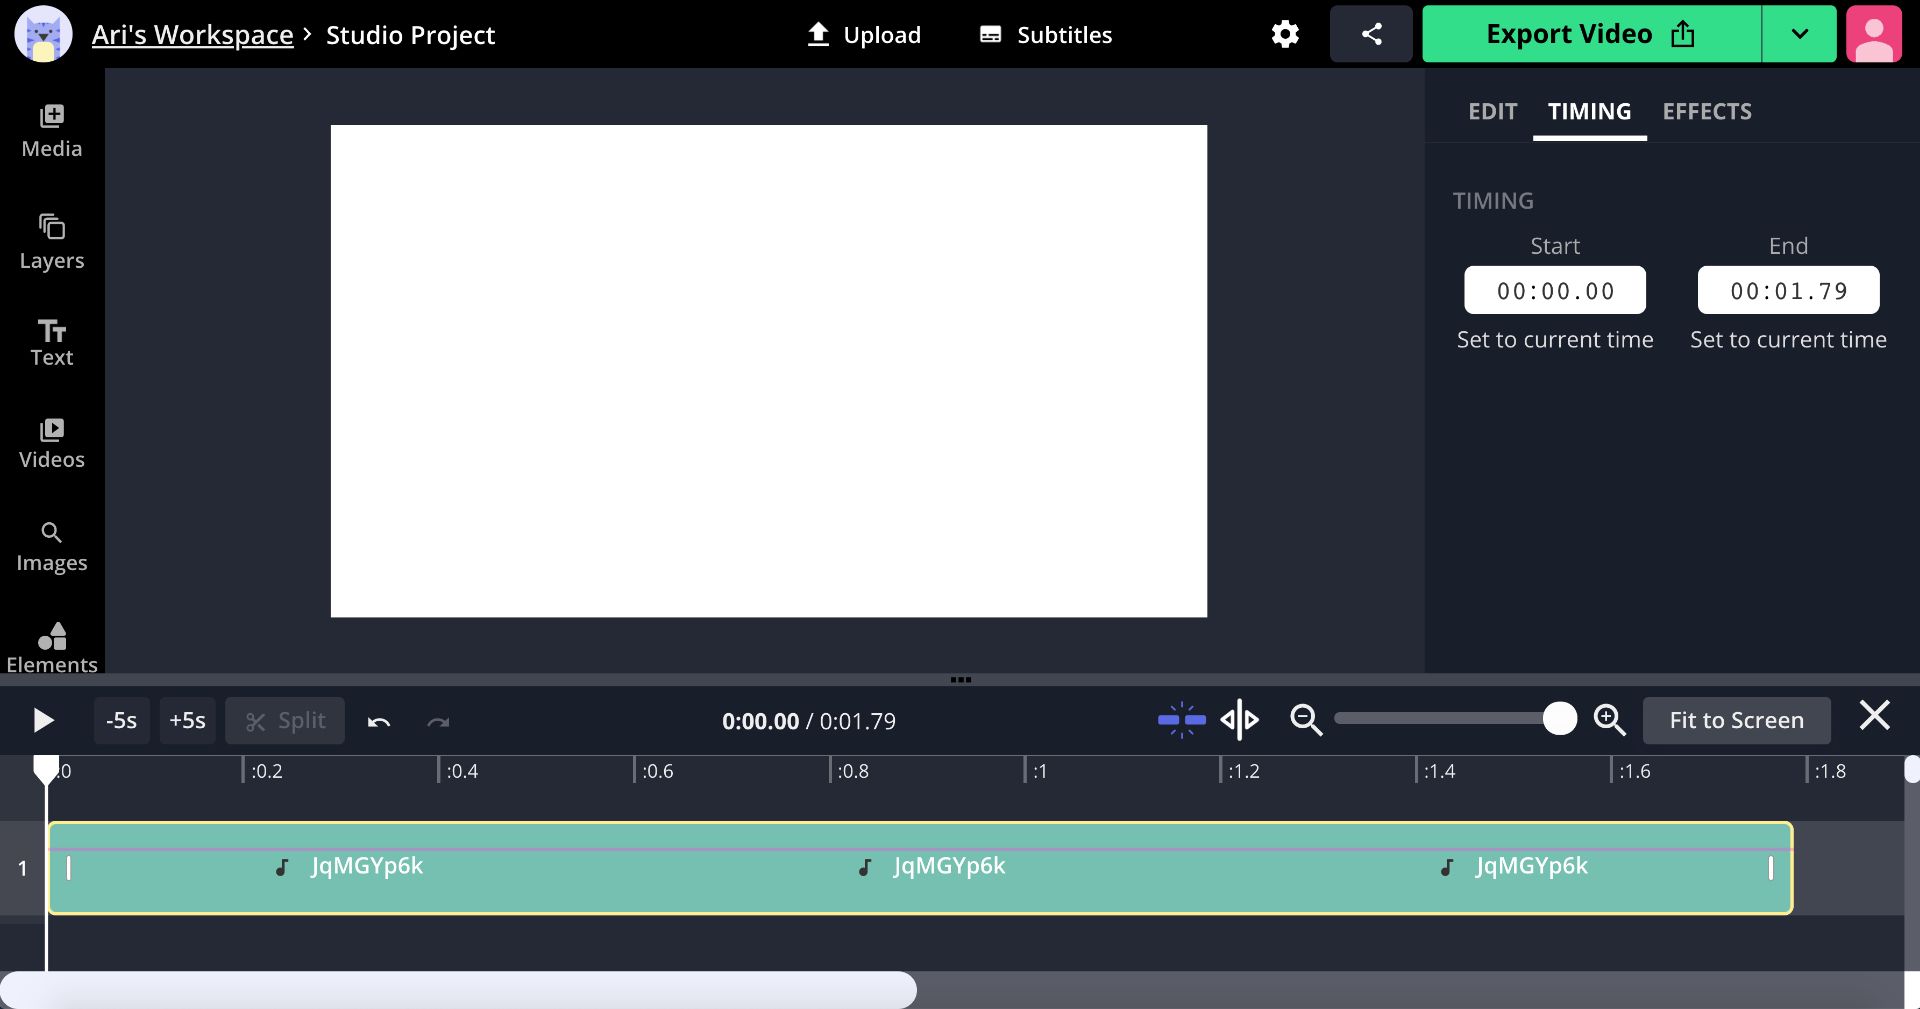
I recommend making your sound between 1-3 seconds long. Drag the ends of the layer to change the length, make precise edits with the Timing tab, and use the split button to remove sections.
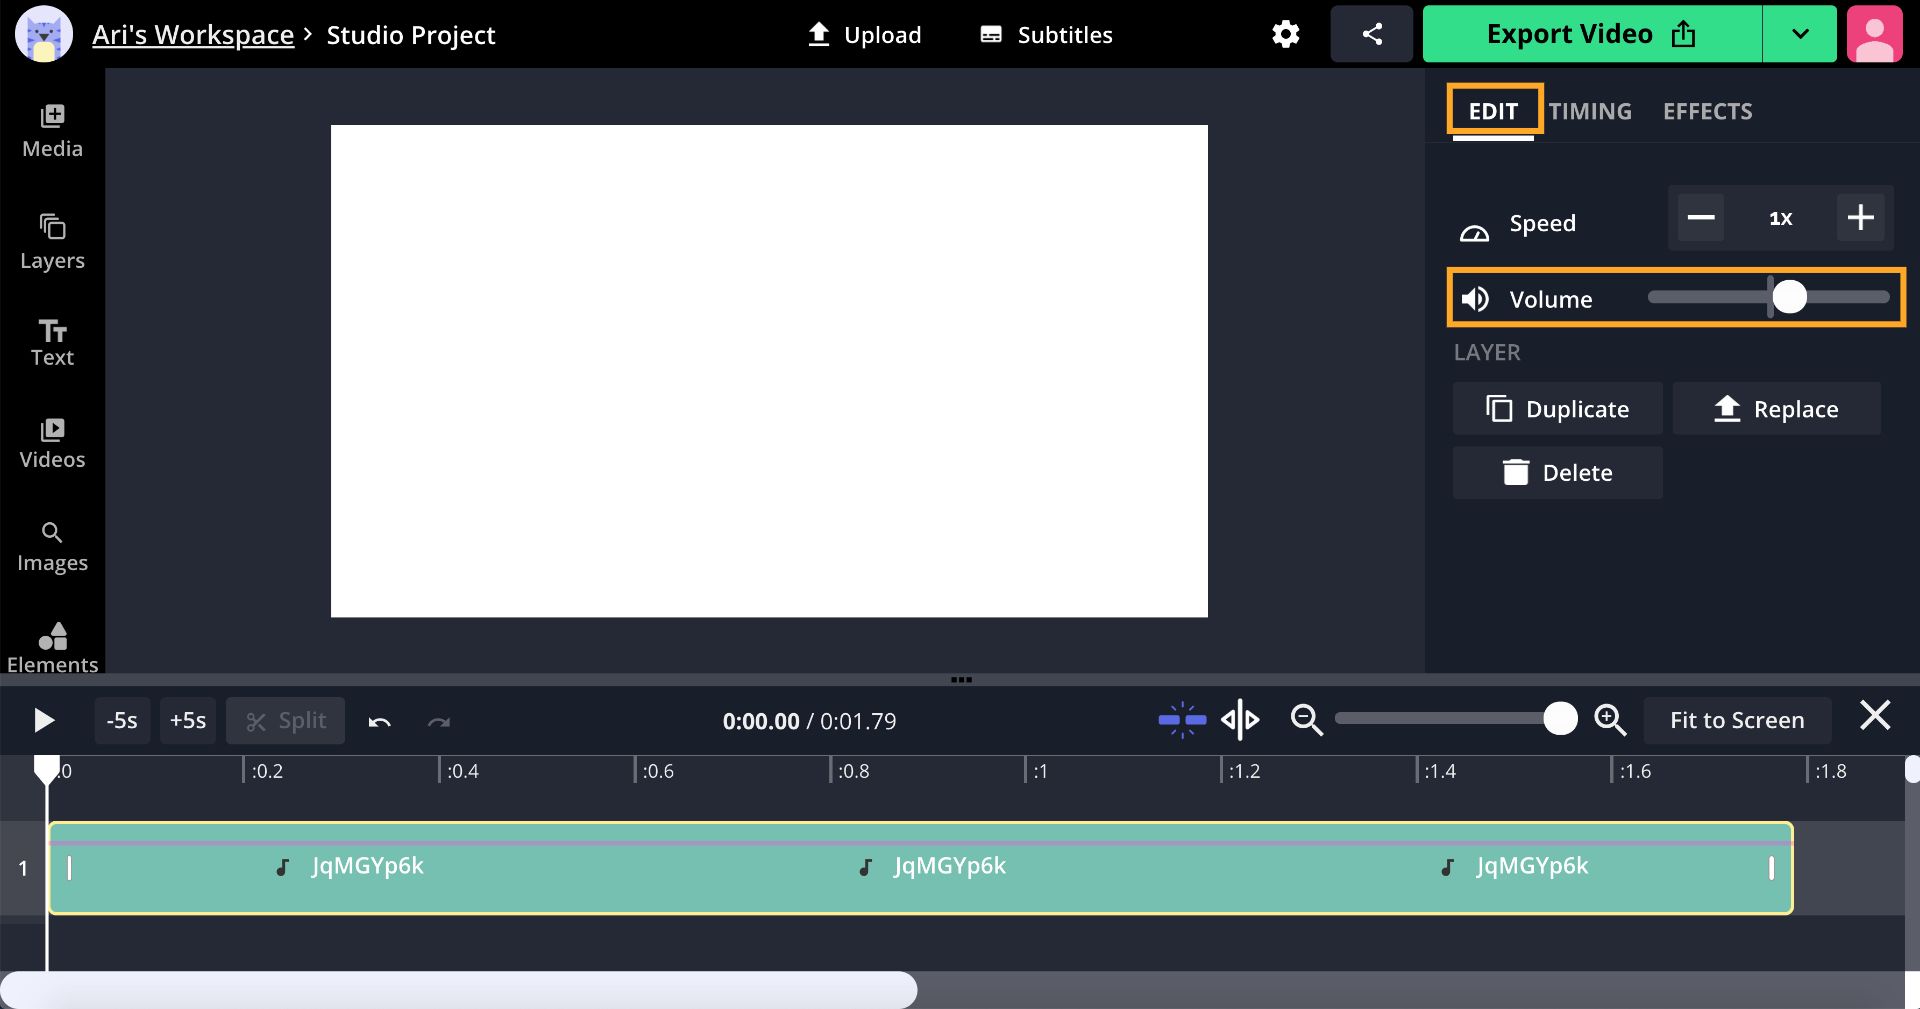
You can tap the canvas, then tap Edit Video or Edit Audio to adjust the volume. Drag the circle to the right to increase the volume or to the left to lower the volume. To finalize the settings, tap Done at the bottom of the screen.
Step Three Export and Download
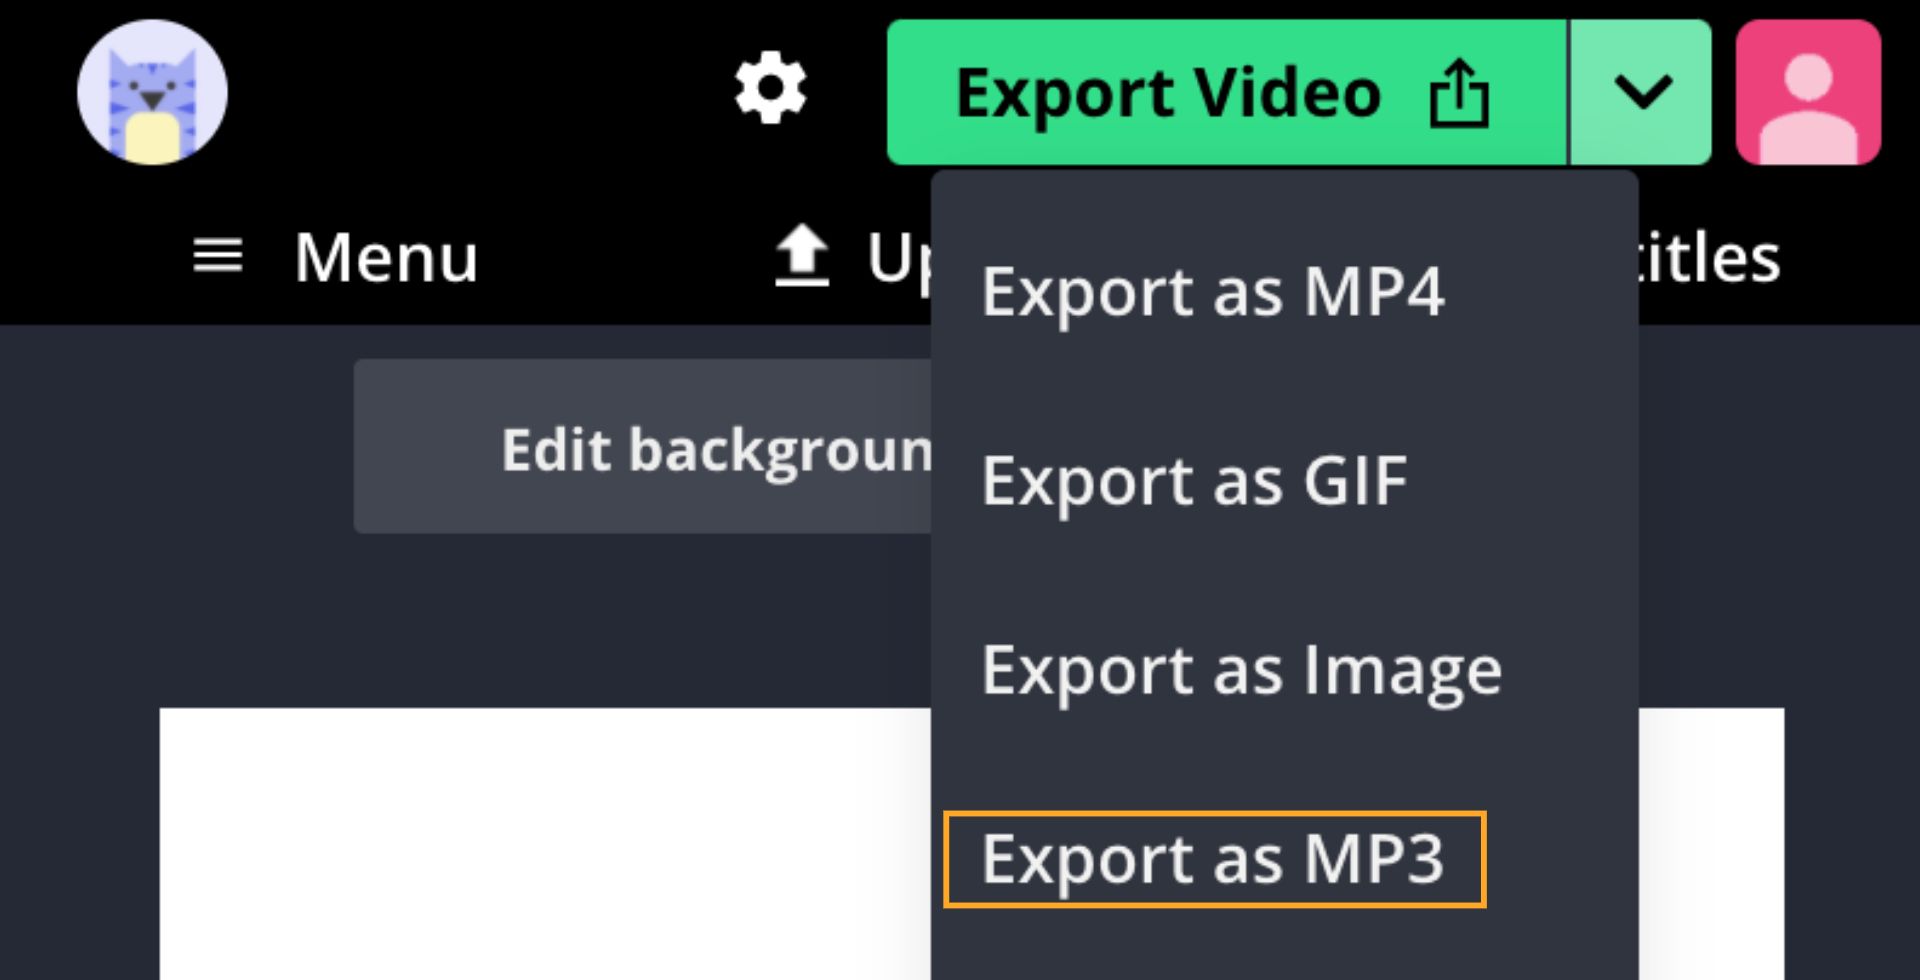
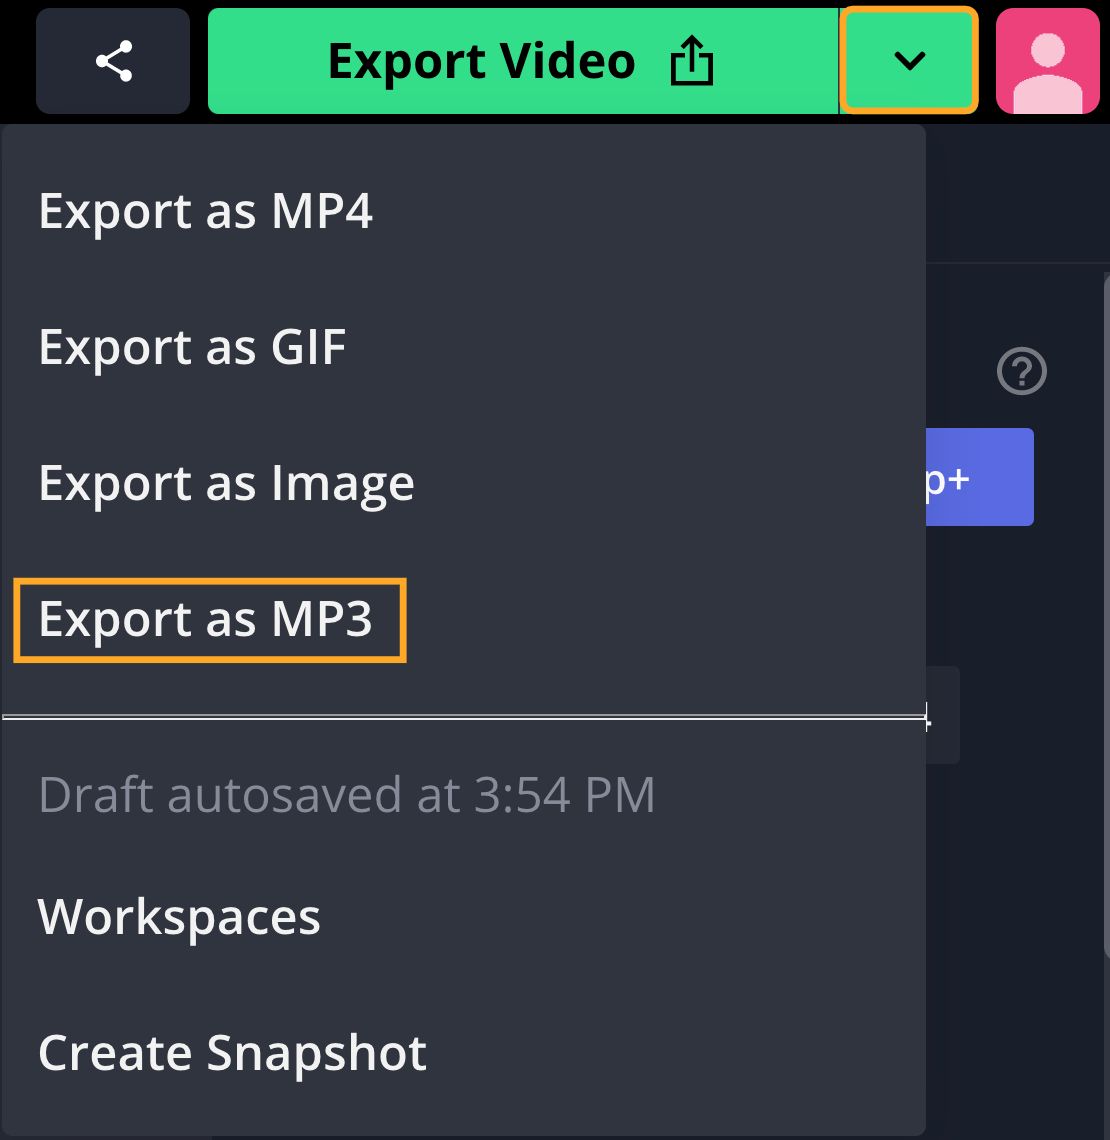
Tap the arrow next to Export Video, then tap Export as MP3 to begin converting the file. When the audio has finished processing, tap Download to save the sound to your files.
Step Four: Open Notifications Folder
On your Android, type "My Files" in the search bar and open the app with the same name. Tap Internal Storage, scroll down to the Downloads folder, and long-press the audio file you created in the previous steps. From here, tap Move.
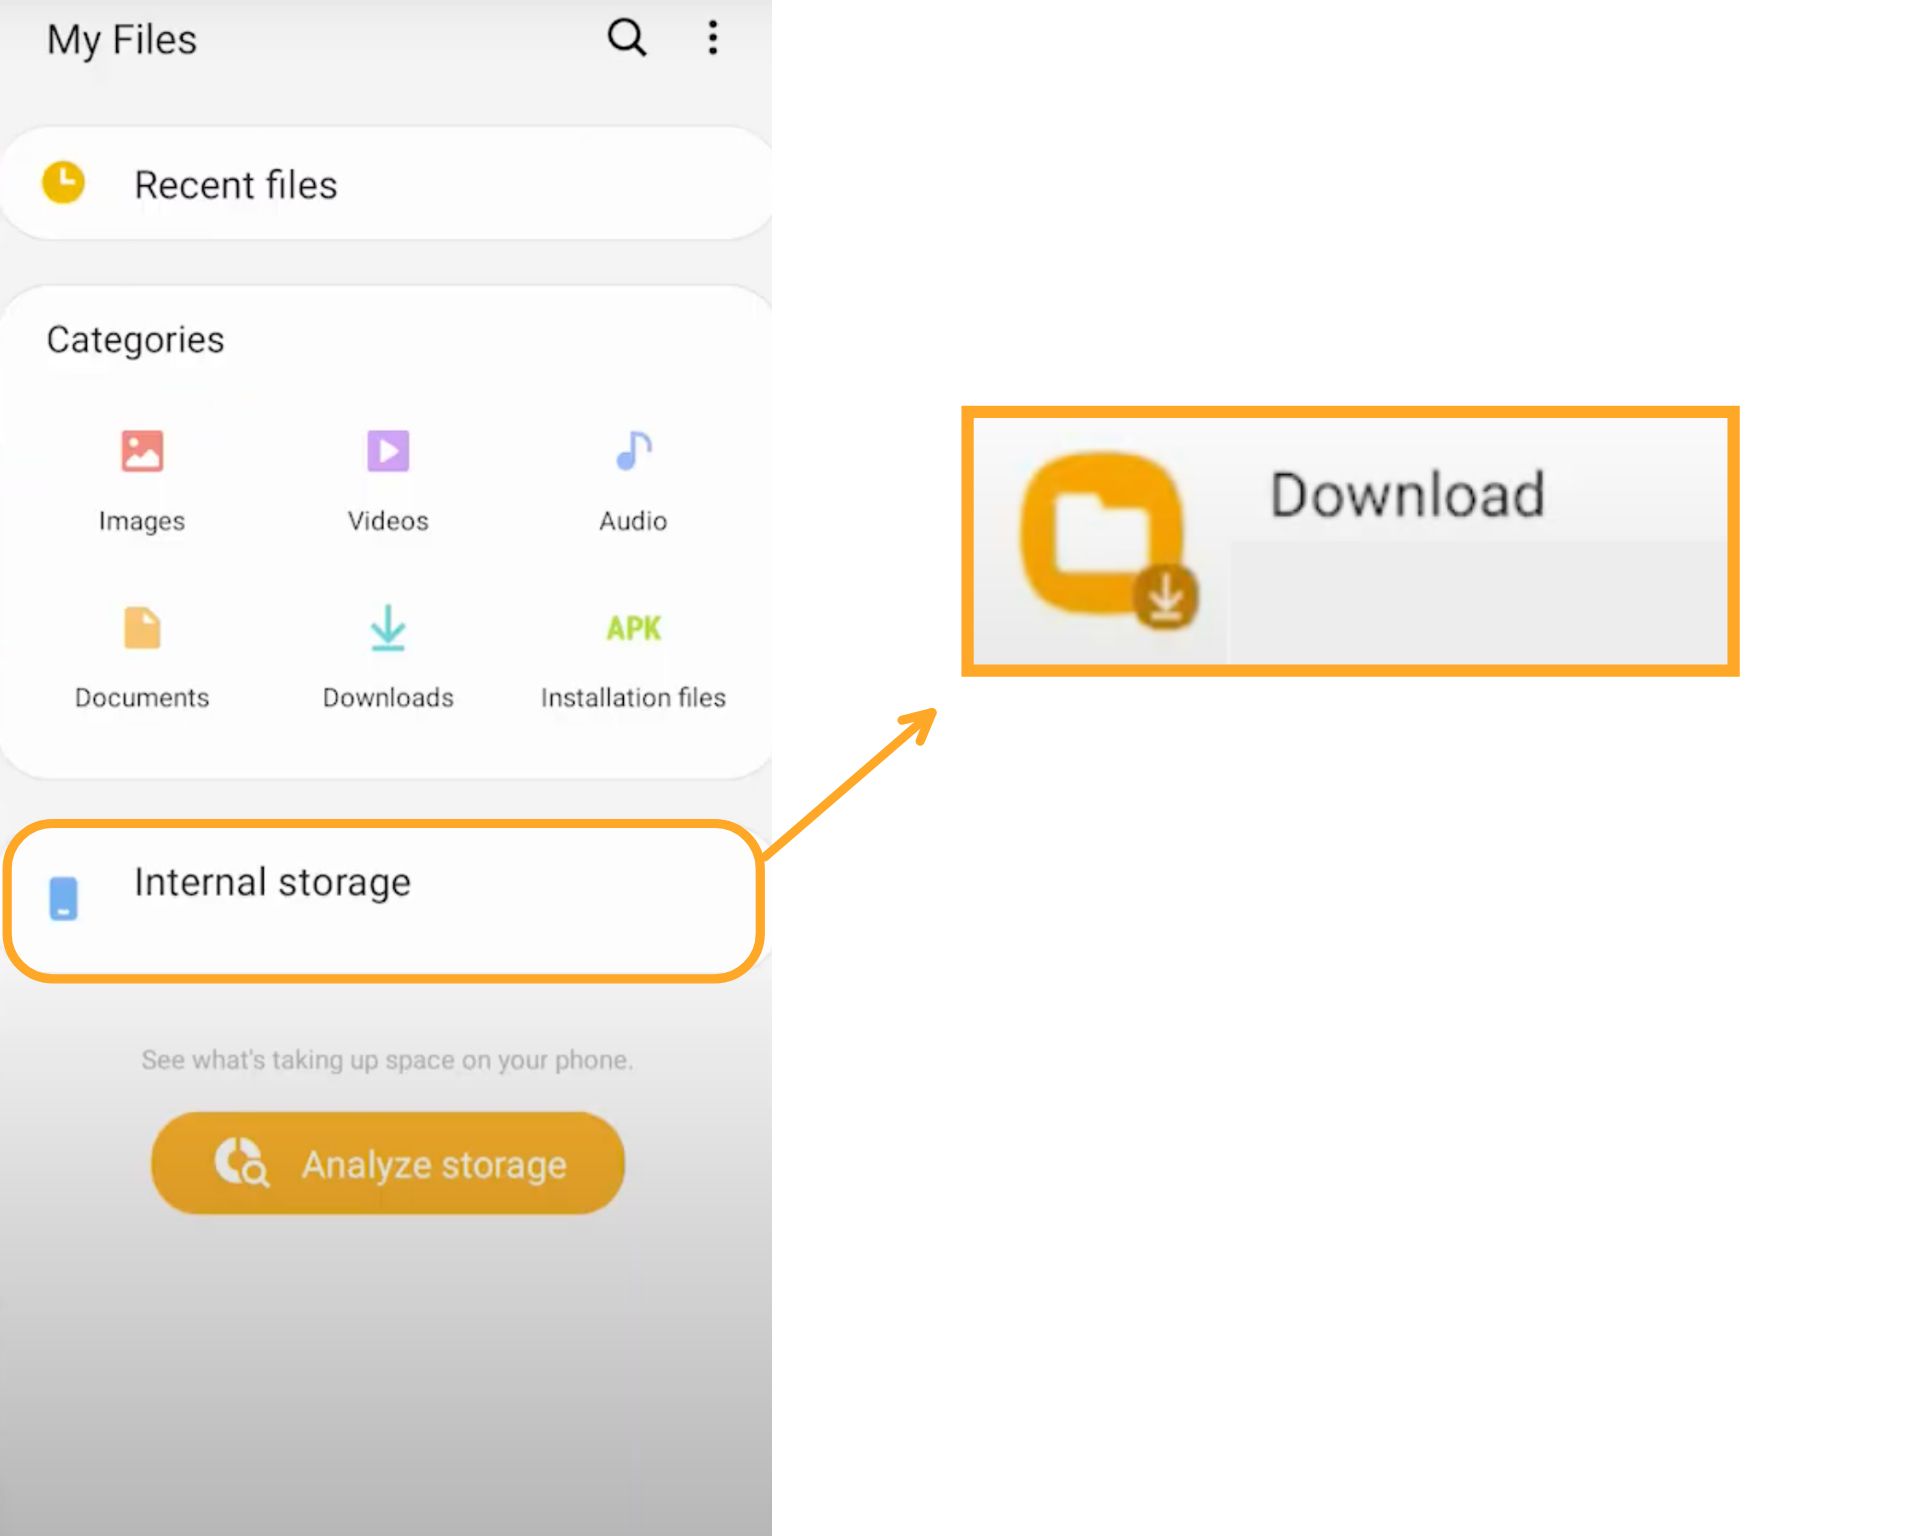
Go to the Notifications folder found in Internal Storage and tap Move Here in the bottom right corner. You'll see the custom sound in the notification sound library for you to use for alerts moving forward!
How to Make a Custom Notification Sound for iPhone
iPhone users have a little more work to do to make and set up a custom notification sound, but this step-by-step tutorial makes the process fairly easy. It's best to get started with a computer but keep your iPhone nearby.
Step One: Upload Audio or Video to Kapwing Studio
Let's begin by uploading a video or audio file into the Kapwing Studio. You can click Start Editing to open the Studio or Sign in to a Workspace to create or access an existing workspace.

Drag and drop a file, click to upload, or paste a link to add your video or audio to the Studio. When the upload is complete, the layer will appear on the timeline beneath the canvas for you to trim, cut, and split until you have the perfect notification sound.
Step Two: Edit Notification Sound
Notification sounds are distinct and abrupt. If necessary, drag the ends of the layer to trim the length, and use the split button (or the "S" key) to remove unwanted sections from the middle. Afterwards, delete any extra clips. For precise edits, click Timing and enter an exact start and end time.

You can adjust the volume to ensure the notification sound is loud enough to get your attention. Select the layer, tap Edit on the right side of the screen, then drag the circle from the left to right to increase or decrease the volume. Click the play button to listen to the sound after each adjustment.
Step Three: Export and Download
Listen to your notification sound a few times to ensure it's the right volume and length. When you're happy with the results, click the down carrot next to Export Video and click Export as MP3, then Export Audio. After the file has been processed, click Download to save it to your computer.
Step Four: Upload to the Music App and Convert File
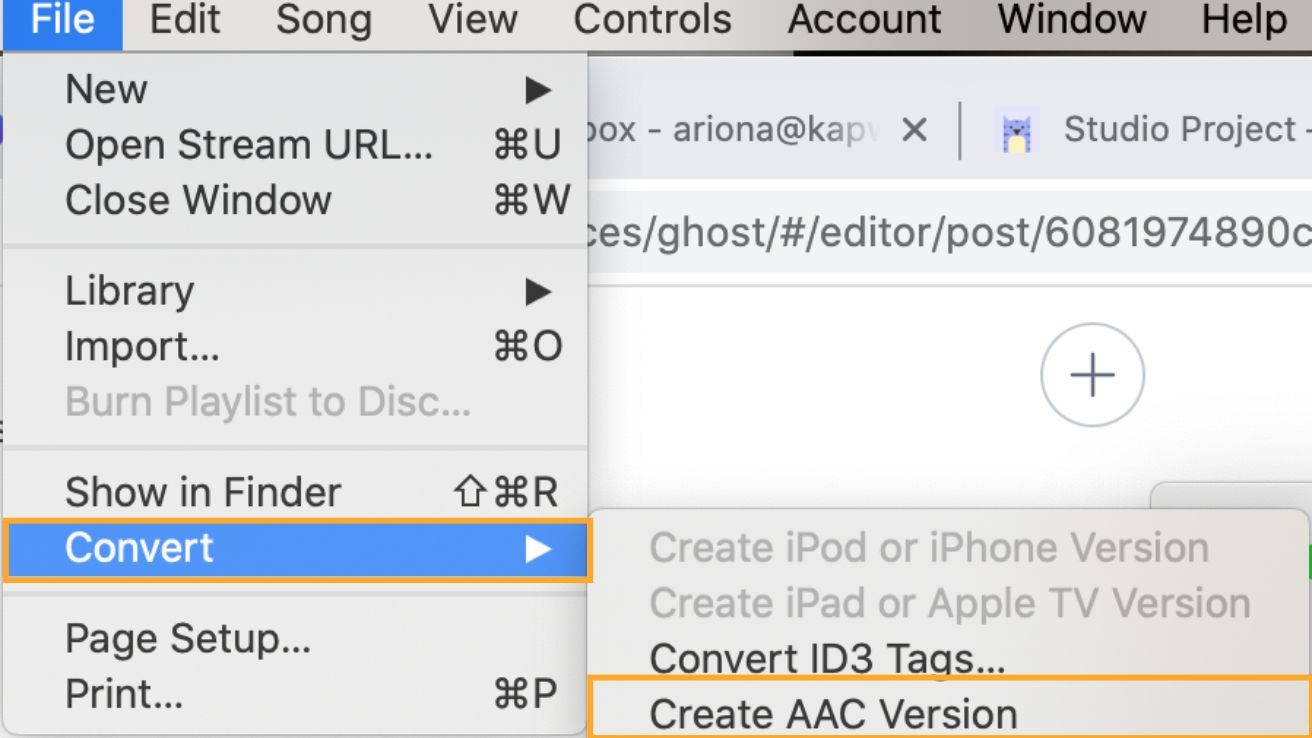
Open the Music App, then drag and drop the MP3 into the library. Click File, Convert, and Create AAC version.
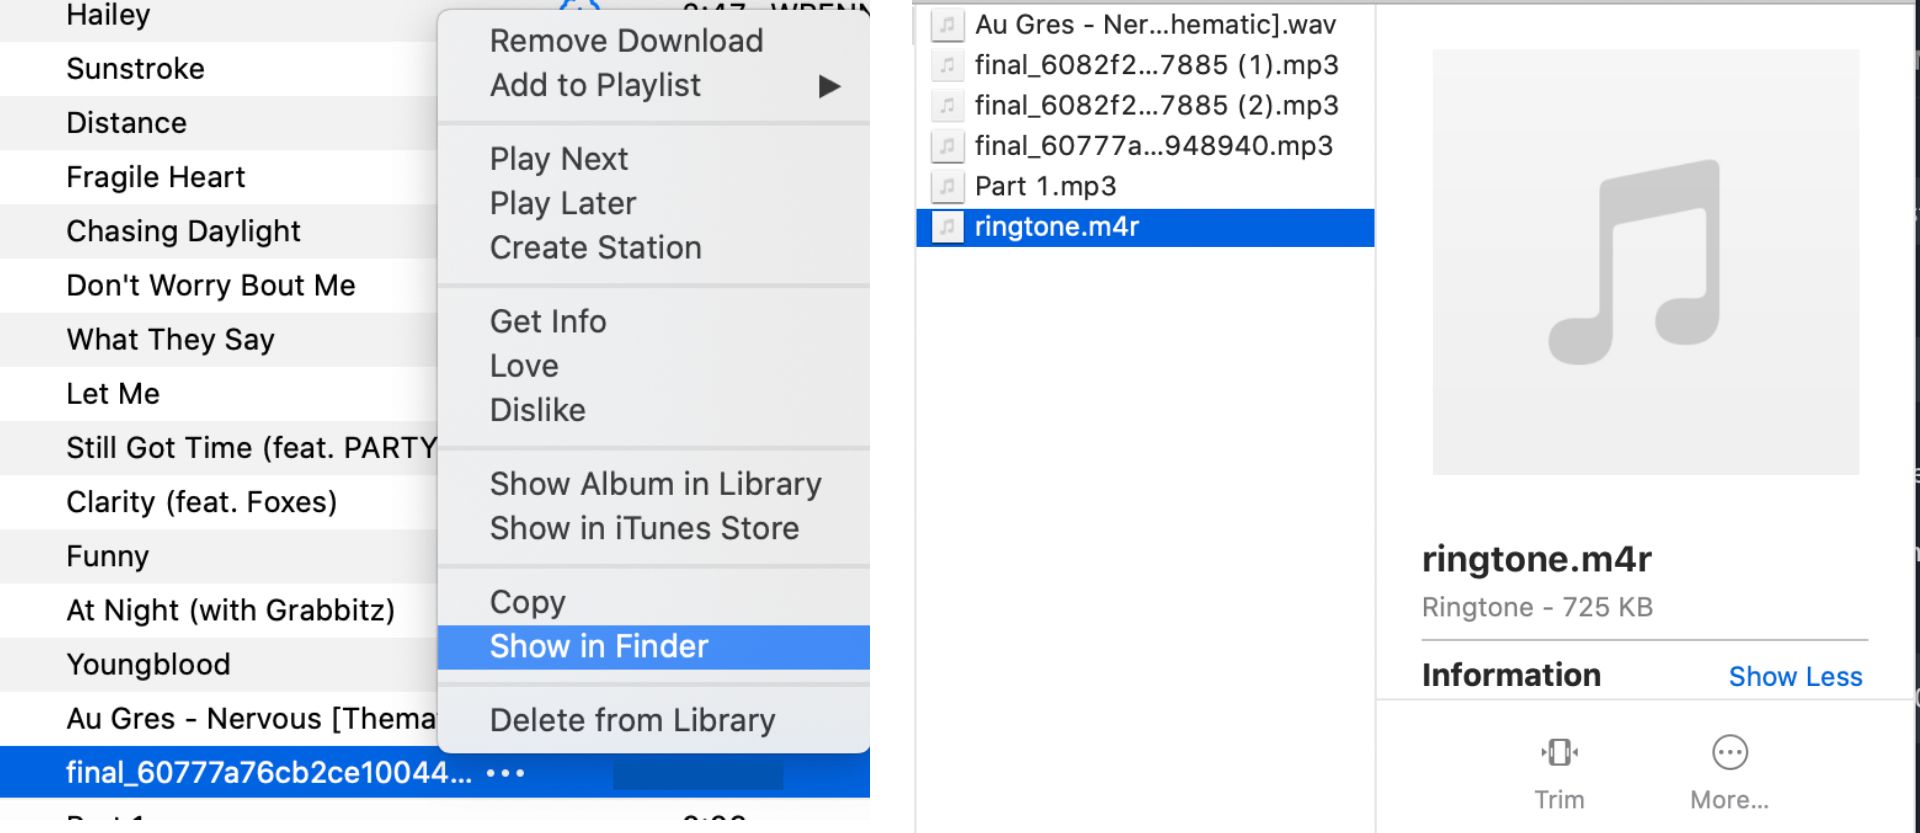
Right-click the duplicate version, then click Show In Finder. Manually change the file extension to M4R by clicking the filename and typing M4R at the end. You can delete the other version from the music library.
Step Five:
With your iPhone connected to your PC, drag and drop your notification sound to your iPhone on the sidebar of the Music App. Grab your iPhone, tap Settings, Sounds & Haptics, and select an alert to change. Scroll down to Ringtones and choose your custom notification sound. You're all set for future alerts!
Browse the articles below to read similar tutorials and subscribe to our YouTube channel to see the best video editing tips and tricks for content creators. Follow us on Instagram and Twitter for updates on the product and life at the Kapwing office.
Related Articles
- How to Make a YouTube Video Your Ringtone
- How to Make a TikTok Sound Your Ringtone or Alarm on iPhone or Android
- Ringtone Cutter: Clip Your Ringtone Online
- How to Find Free Ringtones for iPhone and Android