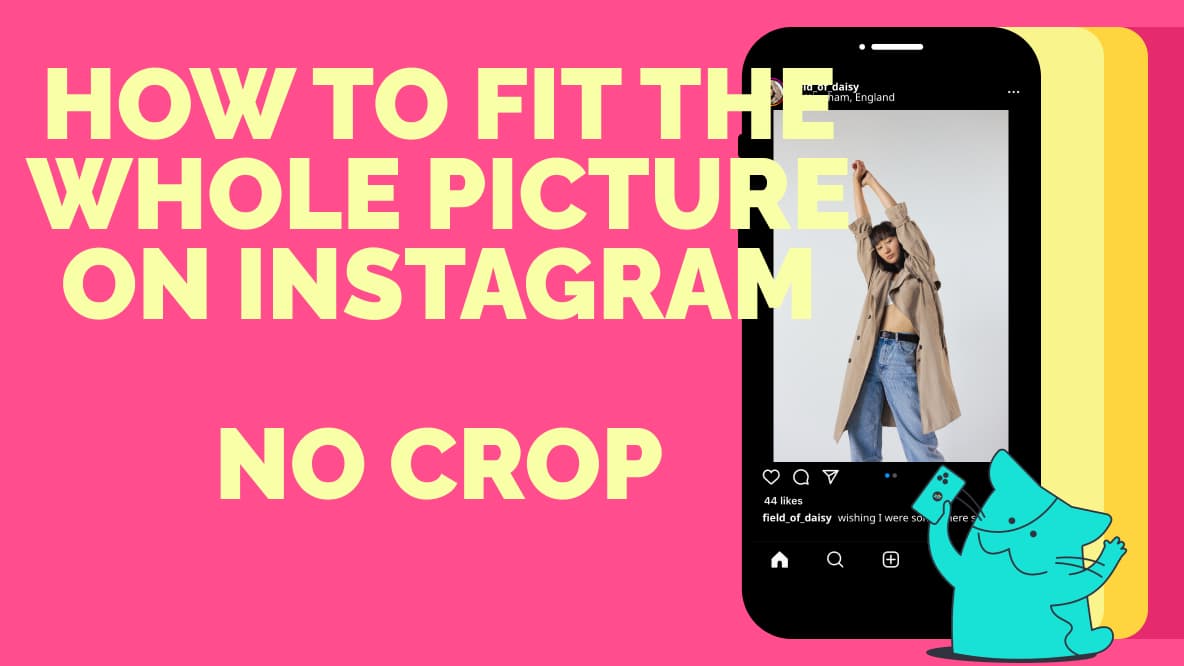
How to Fit the Whole Picture on Instagram Without Cropping
This article shows you how to fit the whole picture on Instagram. If you have a full portrait (9:16) image or video or a landscape (16:9) image or video, you can fit the whole picture in your Instagram post by following this tutorial.
Although it's been a long time since Instagram limited users to just posting square images, Instagram's aspect ratio limitations make it difficult to post a full picture without cropping, especially for carousel posts and portrait images. This limit makes it difficult to fit the whole picture on Instagram without cropping if you’re posting a very tall vertical image or any horizontal images.
So, how can you make a picture fit on Instagram?
To fit the whole picture on Instagram, you need to manually resize it. Otherwise, Instagram will automatically crop it. Use an image resizing tool, like Kapwing, to add a 4:5 canvas to the background of your photo and center the image. Set the canvas color to black or white so it’s less noticeable against Instagram’s user interface. Then export and upload to Instagram without cropping.
In this article, we'll walk you through how to make photos fit on Instagram with detailed steps.
- How to make a tall photo fit on Instagram
- How to fit the whole picture on Instagram without a border
- What's the best Instagram image size?
- FAQs (if you still have questions)
How to make a tall photo fit on Instagram
The best way to make a picture fit on Instagram is to resize it before you upload the photo as an Instagram post. Why? Because you can't actually resize a photo in the Instagram app. You can only crop it.
To keep the full picture and just resize the frame, we recommend using a third party app. Here's how to post the full photo on Instagram using Kapwing, an online photo and video editor.
Note: This method works for both landscape and portrait images.
Step 1) Open a 4:5 Canvas in Kapwing
Open Kapwing's image resizing tool on your phone or computer. Select the 4:5 preset aspect ratio under "Start with a blank canvas."

Now that you have a blank canvas that fits Instagram’s size limits, you can upload multiple photos you want to turn into a 4:5 Instagram post.
Step 2) Upload the Image You Want to Resize
Tap the Media tab on the menu bar at the bottom of your screen then tap the “Add Media” button.
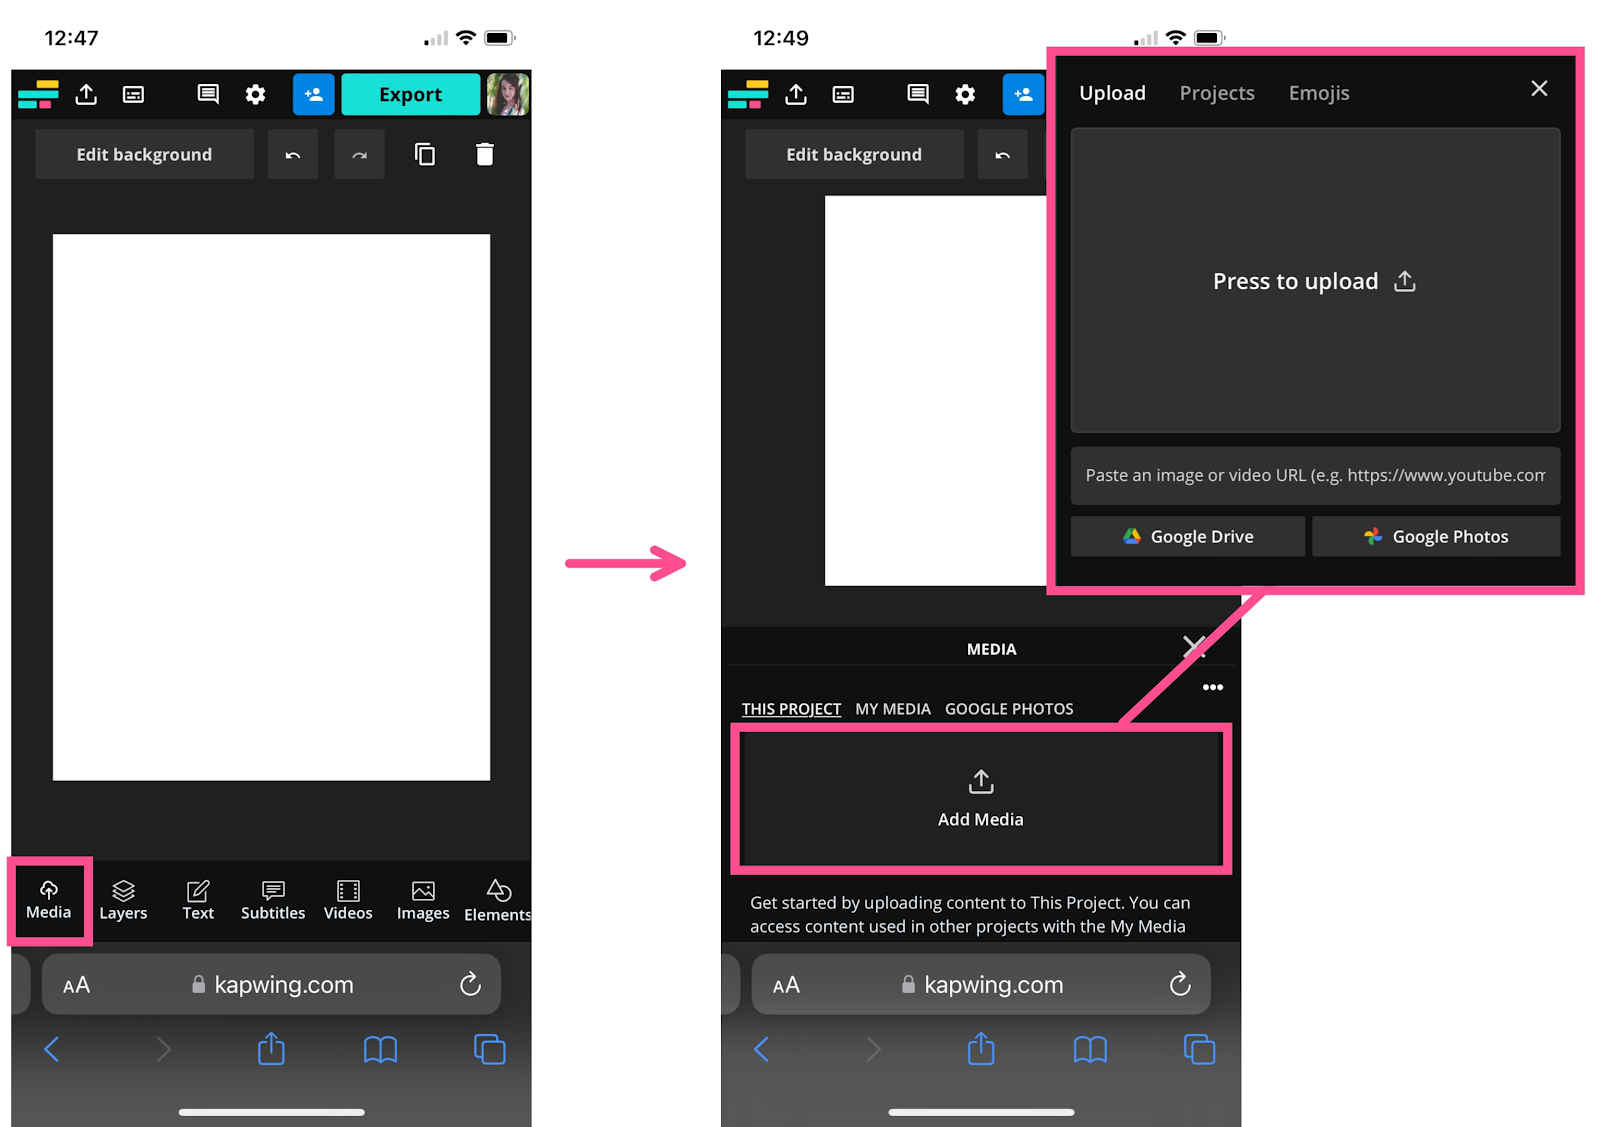
Upload photos from your camera roll or import it from a URL. Kapwing also integrates Google Photos and Drive, if your image is stored on the cloud.
The photo will be added to the Media tab.
Step 3) Center the Photo on the Canvas
Tap the blue plus icon over the image to add it to the canvas.
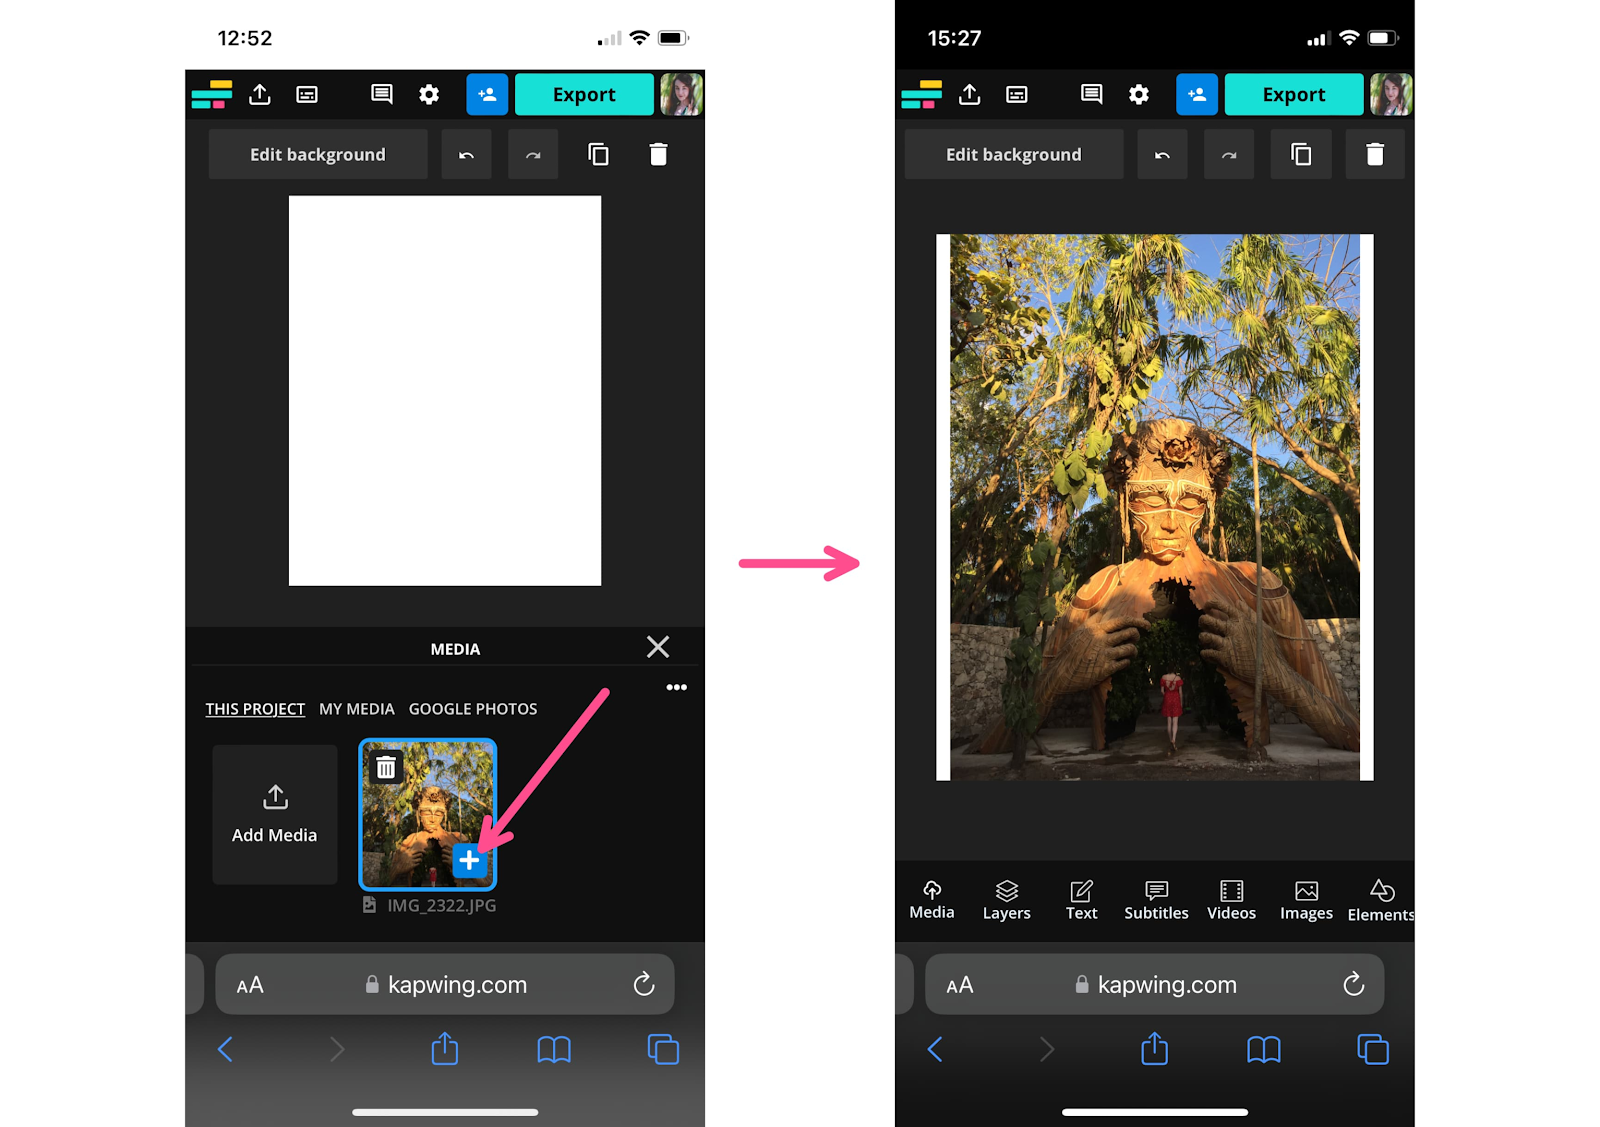
Kapwing will automatically center the photo in the middle of the canvas. This will add a white border to either side of the image.
Step 4) Set the Background Color for the Image
Tap outside the image to select the background. The edit button at the top of the screen should change from “Edit image” to “Edit background.” Tap it.
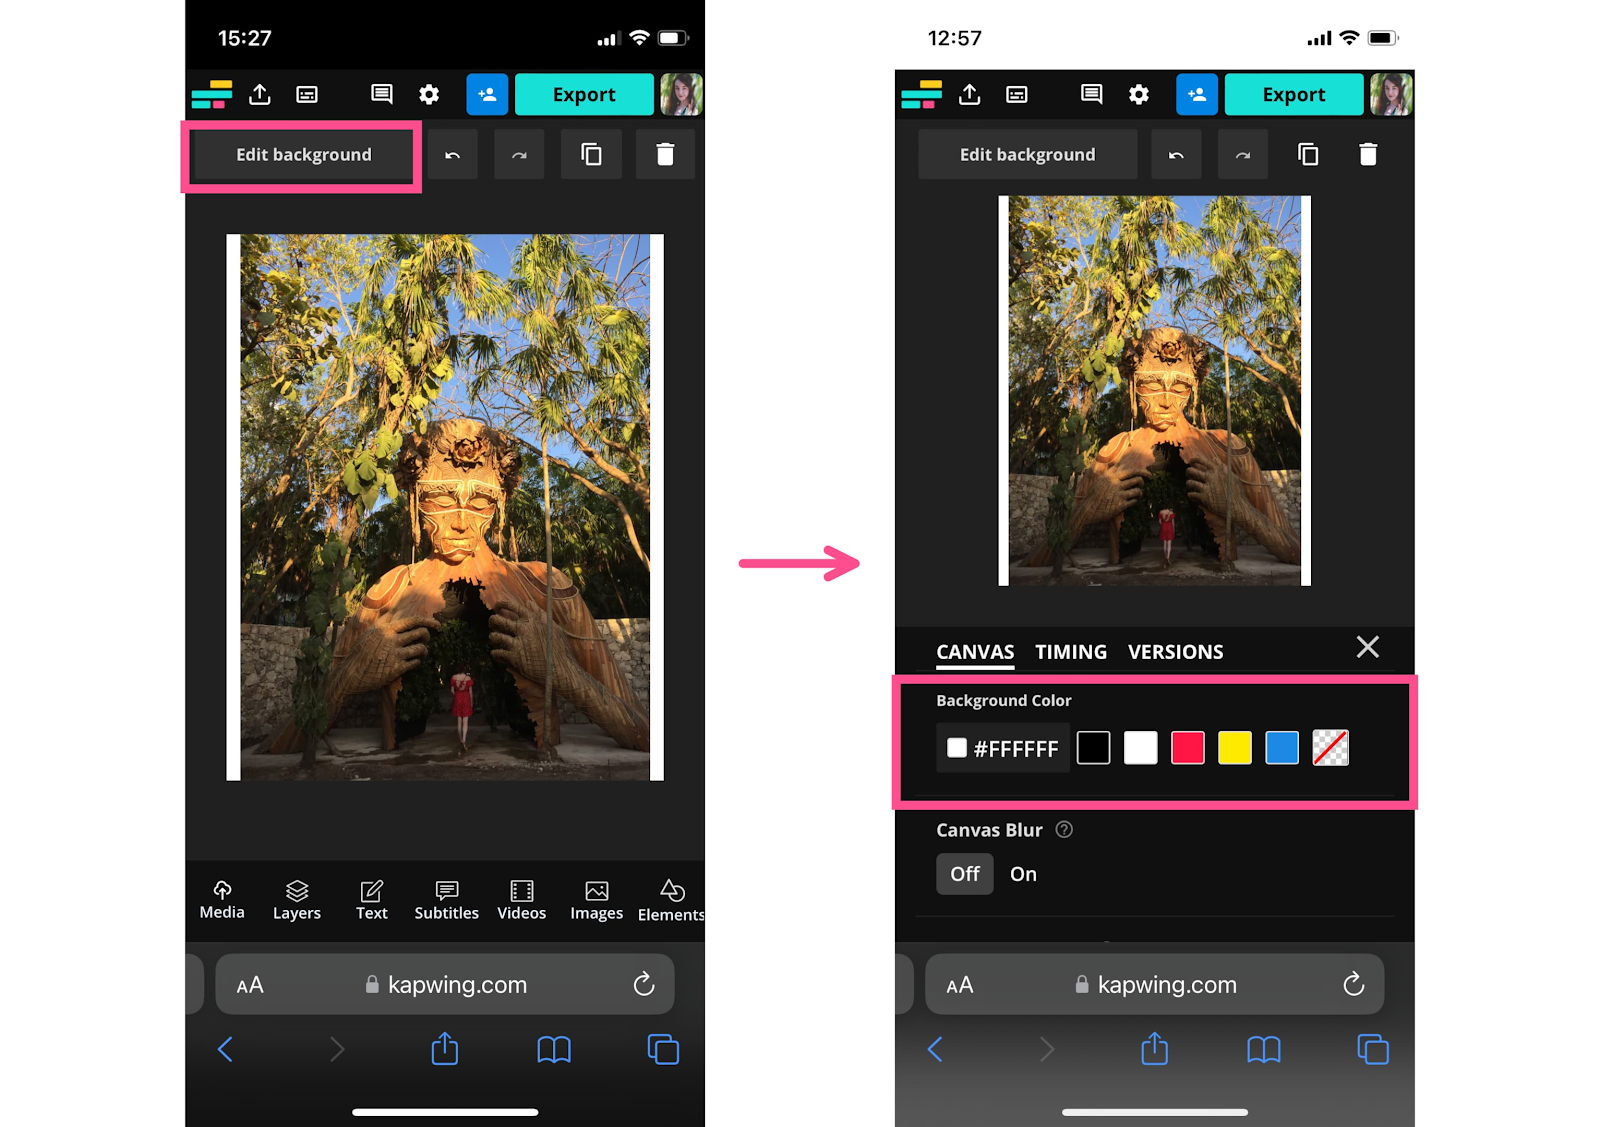
Scroll down until you see the canvas Background Color options.
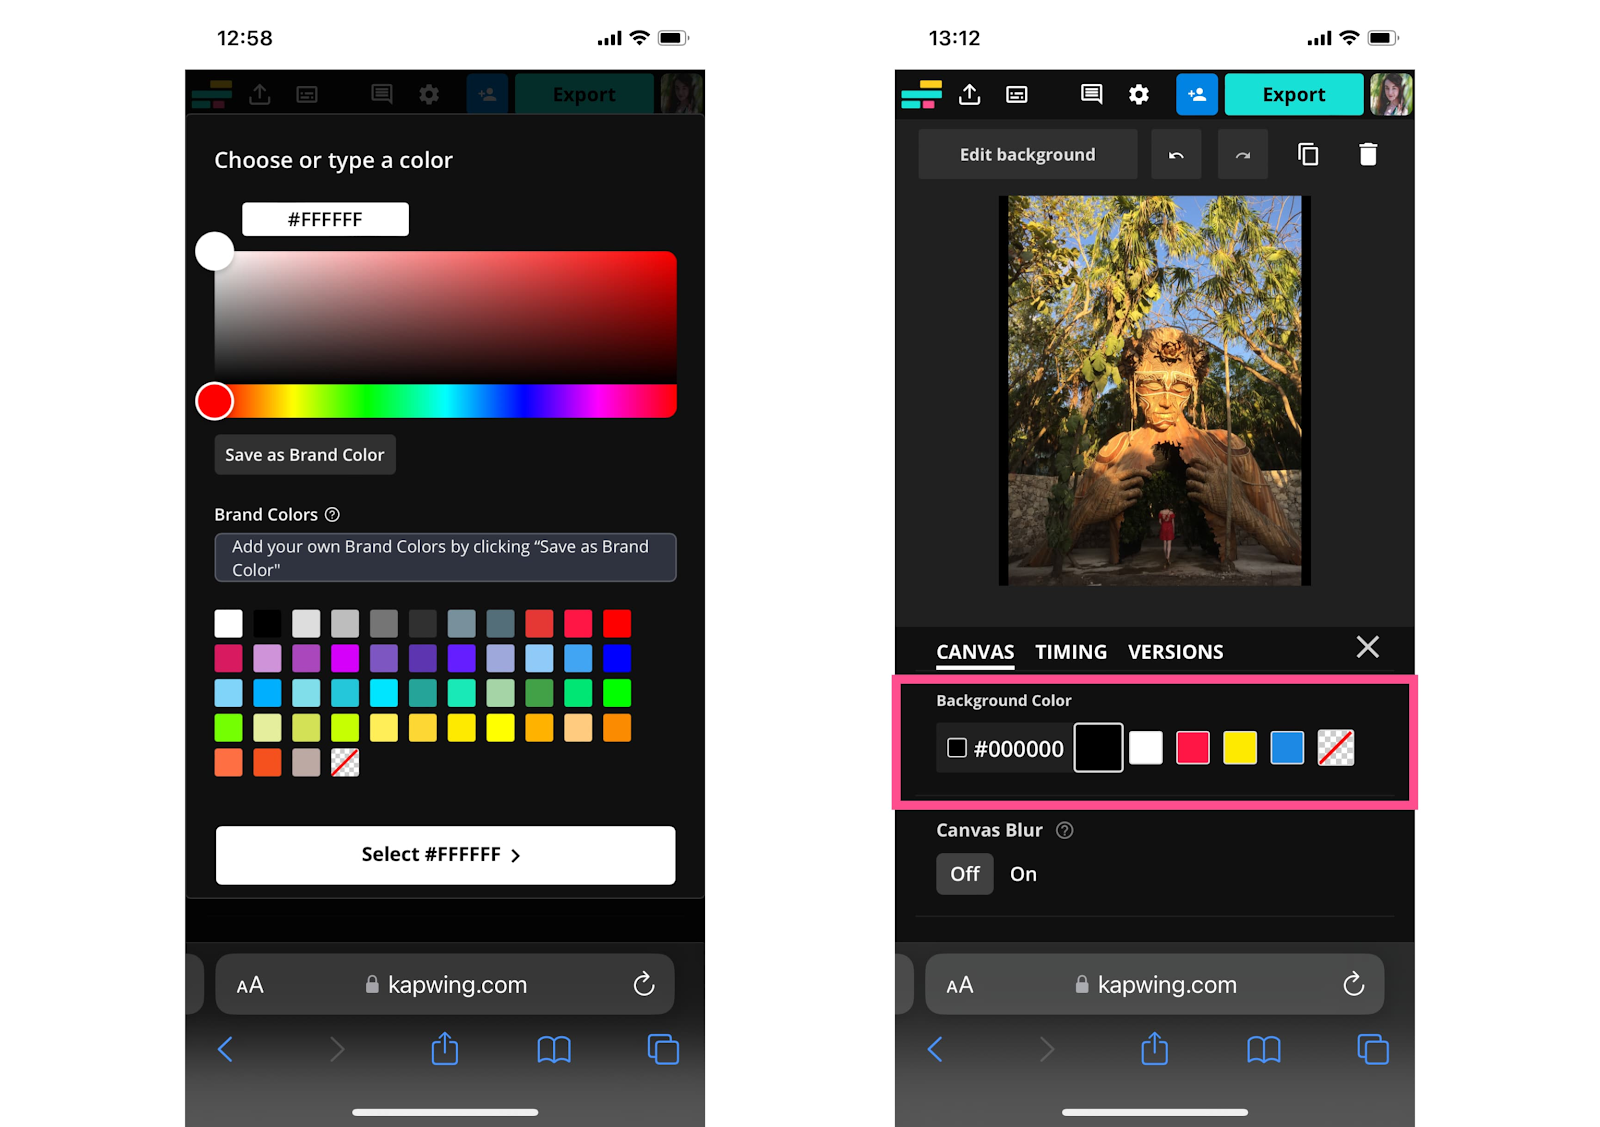
You can choose any background color you want using the custom color picking tools, but if you want your Instagram post to look like it doesn’t have a colored border, set the background to black. More on why in the next section.
Step 5) Download the Picture and Post on Instagram
Tap the export button in the top right corner of your screen and export portrait photo as a JPEG.
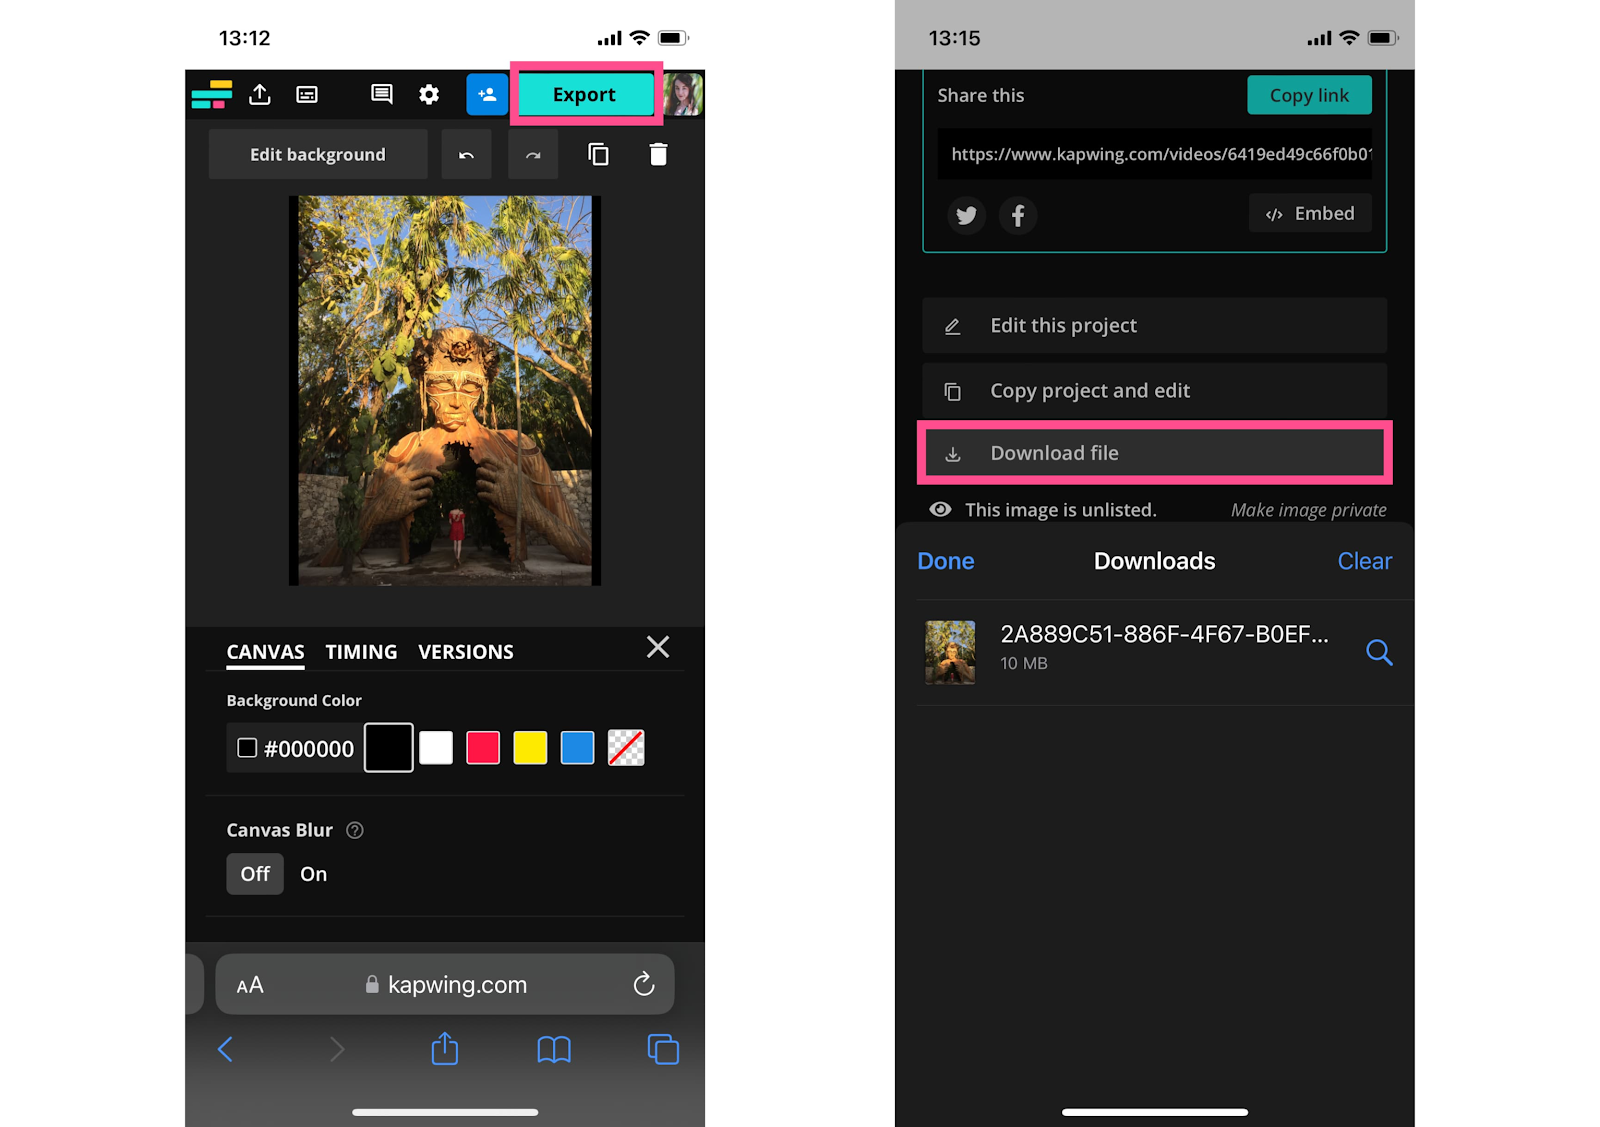
Once the image has been exported, scroll down to the “Download file” button and tap it and save the image to your phone’s camera roll.
Open Instagram and publish as normal. You can use this method to post multiple photos individually or resize different photos to all fit in a single carousel post, all without having to crop anything.
Related: How to Post Multiple Images with Different Sizes to Instagram
How to fit the whole picture on Instagram without a border
Resizing a photo for Instagram can be frustrating, especially when it adds a background behind the image, which could distract from your photo.
Normally, you could turn the image into a PNG and remove the white background, turning those pixels transparent. However, Instagram doesn’t currently support transparent background PNGs. It converts PNGs to JPEGs and converts any transparent pixels to black pixels.
You could resize your photo by using a cropping tool to make it fit the entire picture post size. Or, to make a resized Instagram photo look like it doesn’t have a border, adding a black border is actually best. Here’s why:
More than 80% of smartphone users have dark mode turned on and Instagram uses your phone’s settings by default. That means that most Instagram posts will be viewed in dark mode on a mobile device. Including yours, probably.
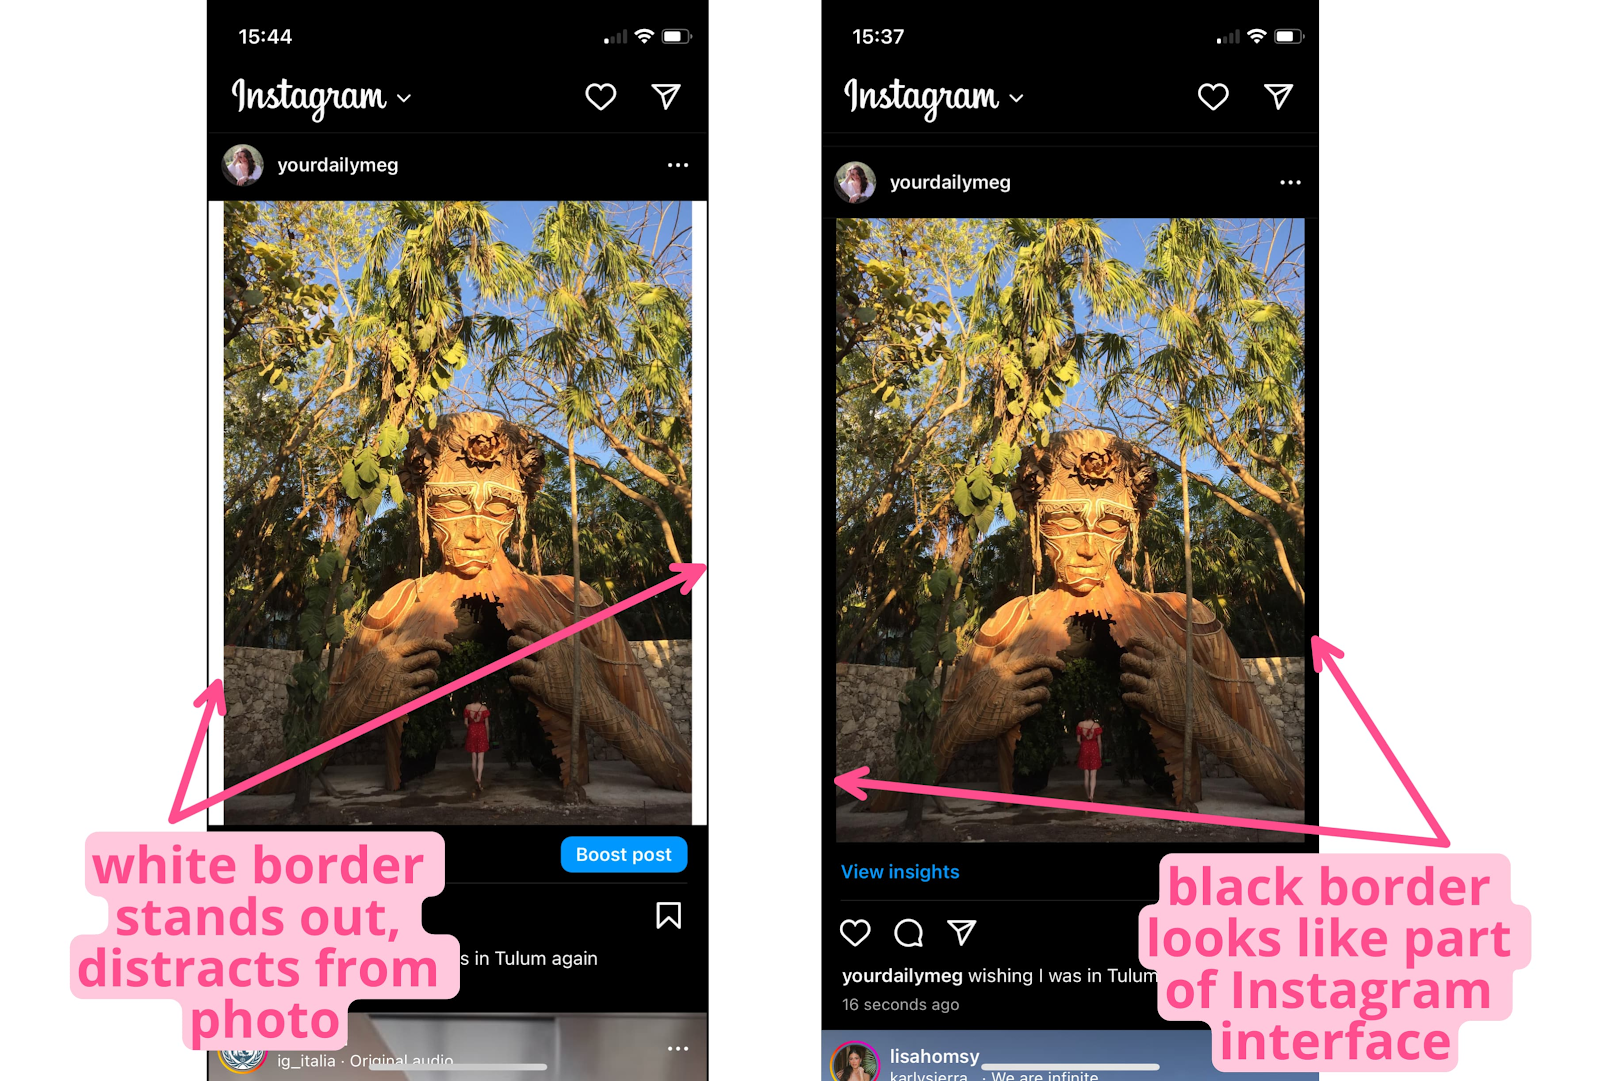
As you can see in this example, a white background stands out against dark mode and distracts from the photo. The black background, on the other hand, blends right in and looks like part of the Instagram interface behind the post.
If you post multiple photos that are tall portrait images or wide landscape photos, using the most discreet background on your posts will look better in the feed and on your own profile grid.
It’s an imperfect solution, but until Instagram supports transparent background PNGs, it’s the best way to fit the whole picture on Instagram without a super obvious border.
Related: How to Post a Portrait Image or Video to Instagram Without Cropping'
What's the best Instagram image size?
Instagram image posts support aspect ratios between 1.91:1 and 4:5. We've discussed how to make an image fit on Instagram by resizing it, but what about your image size? The actual resolution of the image and how it will look in your Instagram posts?
The Instagram app is pretty notorious for compressing high-res photos down. According to Instagram, your Instagram photos should have the following dimensions for the best resolution:
- 566 to 1350 pixels high
- 320 to 1080 pixels wide
If you upload a photo on Instagram that is too small, Instagram will automatically enlarge the photo to at least 320 pixels wide. If you upload a photo that is too large, Instagram will automatically resize it to be a lower resolution and only 1080 pixels wide.
When Instagram compresses pictures, they tend to lose a lot of detail and look grainy, so we recommend you resize your photo using a third party app that supports lossless compression before uploading the photo to the Instagram app.
To ensure that your full size picture is share on Instagram at its largest possible size, these are Instagram's recommendations:
- Make sure you've downloaded the most recent version of the Instagram app
- Upload a photo with a width of at least 1080 pixels with an aspect ratio between 1.91:1 and 4:5
- Make sure the phone you're taking photos with has a high quality camera
Hopefully this article has helped you make your photos fit on Instagram. For more info and tutorials like this, visit our Resources Library or check out our YouTube channel.
And if you still have questions about how to fit the whole picture on Instagram, you can browse the frequently asked questions below.
Frequently Asked Questions
1. Why do my pictures not fit on Instagram?
Instagram imposes a maximum 4:5 aspect ratio limit on all image posts. That means if your image is between 1:1 (a square) or 4:5 (a vertical rectangle that is four pixels wide for every five pixels tall), you can post it. If it’s taller or wider than that, like portrait photos or landscape photos, Instagram will automatically resize the image by cropping it to fit those dimensions.
2. How do I stop Instagram from cropping my photos?
If Instagram is cropping your 4:5 images to square, tap the expand arrows in the left corner of the new post preview. This will toggle the post size to 4:5. If your image is taller than 4:5, you can resize the photo with a third-party tool like Kapwing. Center your photo on a 4:5 canvas and save.
3. What are the aspect ratio rules for Instagram?
Instagram allows for uploading photos in several different aspect ratios. It has an aspect ratio limit of 4:5 for image posts, but also supports 1:1 images for users who still post square images. Instagram also has a 9:16 video size limit for Reels.
Try these popular Instagram resources:
- How to Grow Your Instagram in 2023
- How to Post a Portrait Photo or Video on Instagram
- Instagram Reels Safe Zones Template
- YouTube to Instagram Converter
- Video Progress Bar Generator