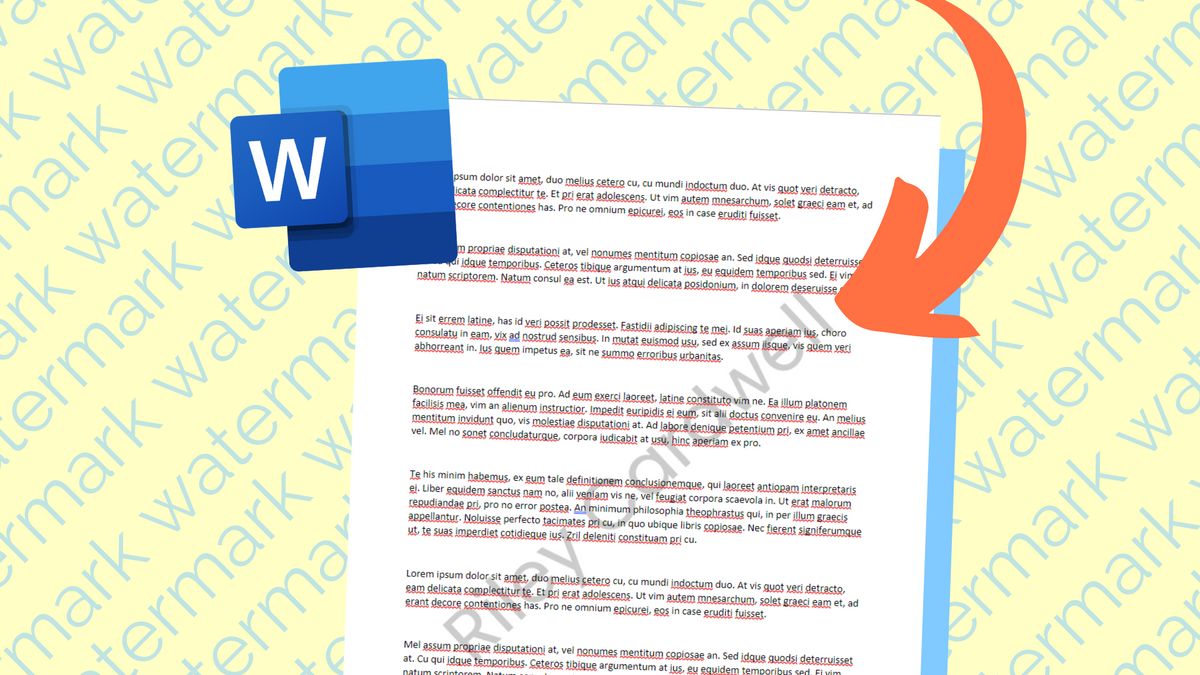
How to Add a Watermark to a Word Document
Watermarking Word documents gives your reader invaluable information about the contents. Whether you need a “confidential” message, a company logo or you just want to add some creative touch, Word can do it all. In this article, you’ll learn how it’s done on Word’s desktop or web application.
Watermarking Word documents gives your reader invaluable information about the contents. Imagine if you sent a confidential document to a coworker without a watermark and that person forwarded it to the rest of the company. That wouldn’t be good. But, a “confidential” watermark behind the text gives your coworker the context they need.
Word makes it easy to add any kind of watermark to your documents. Whether you need a “confidential” message as mentioned, a company logo or you just want to add some creative touch, Word does it all. In this article, you’ll learn how it’s done whether you’re using the Word’s desktop or web application. Also, I’ll show you how to make a custom watermark for free. Let’s begin.
Word Desktop App
Word’s desktop makes it easy to add a watermark with preformatted templates. First, open your Word doc and select ‘Design’ from the top bar. Next, choose ‘Watermark’ on the right and pick a template from the list to appear behind the text.

If you don’t want to use a template, click ‘Custom Watermark’ from the bottom of the menu. A prompt will appear where you can choose to upload a picture or write a custom text watermark.
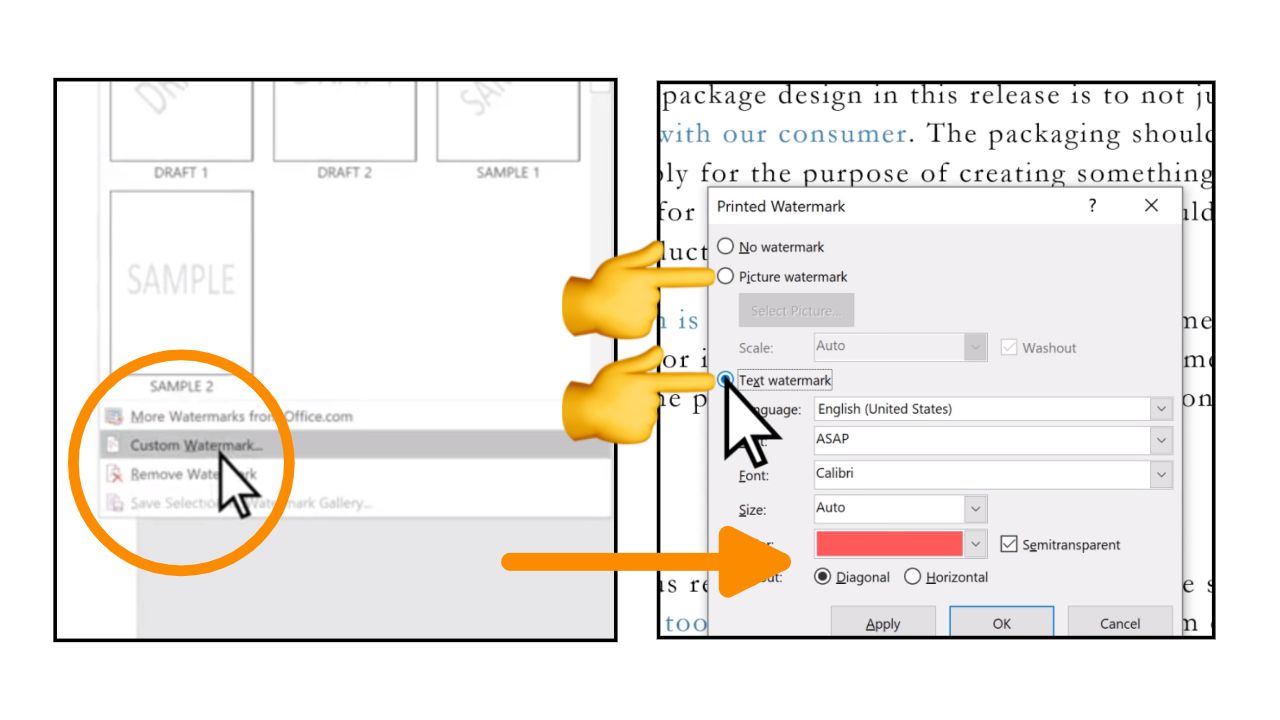
Custom watermarks are best when you want to add a company logo or a bit of artistic flair. For images, go for a simple image that doesn’t distract from the reader from the text. For the custom text, change the font, formatting and color with the menu options to make it easy for the reader to see.
Word Web App
If you don’t have the paid version of Word, that’s okay because the free web app will get the job done. Since this version doesn’t have the ‘Design’ tab, we’ll be using an image in its place to create the perfect watermark.
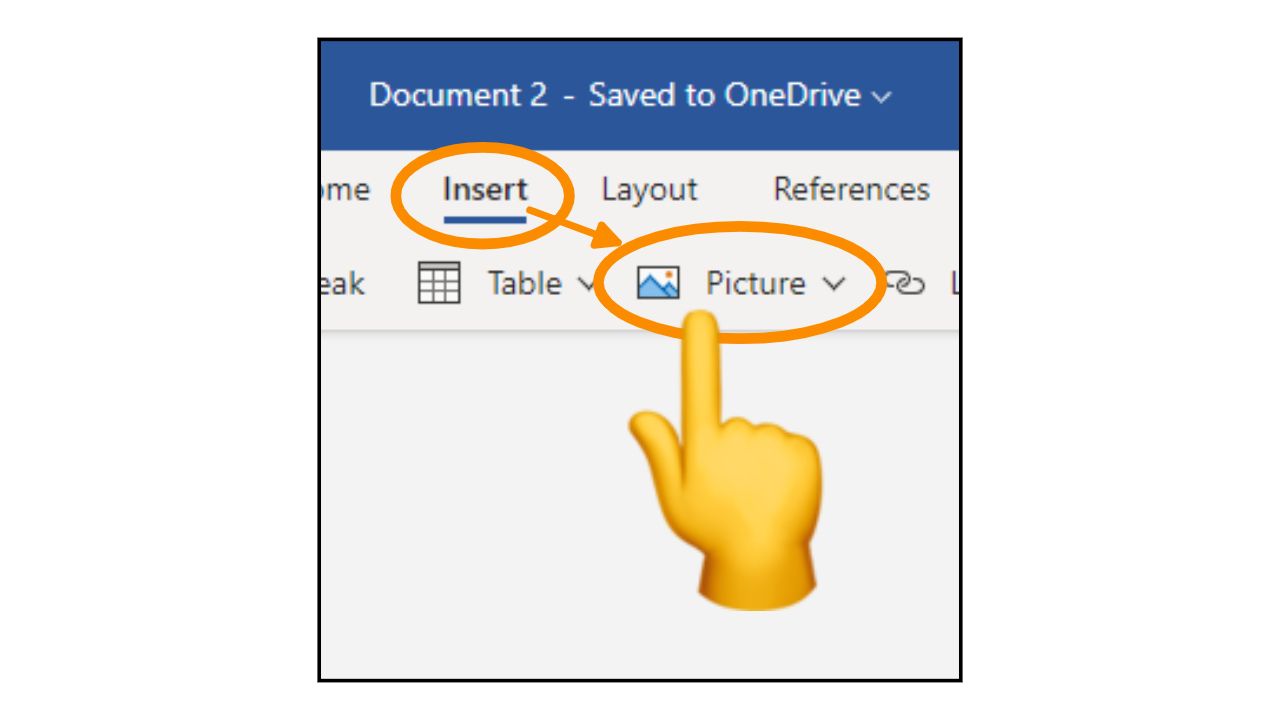
First, open your Word doc and click the ‘Insert’ tab from the top. Next, choose ‘Picture’ and upload the picture from your device, OneDrive or Bing Pictures.
Now, the image will break up your text. At this point, make sure to drag the image where you’d like it to appear in the document and drag the corners to make it fit the page. Once you’re satisfied, click ‘Wrap Text’ from the toolbar and change it to ‘Behind Text.’
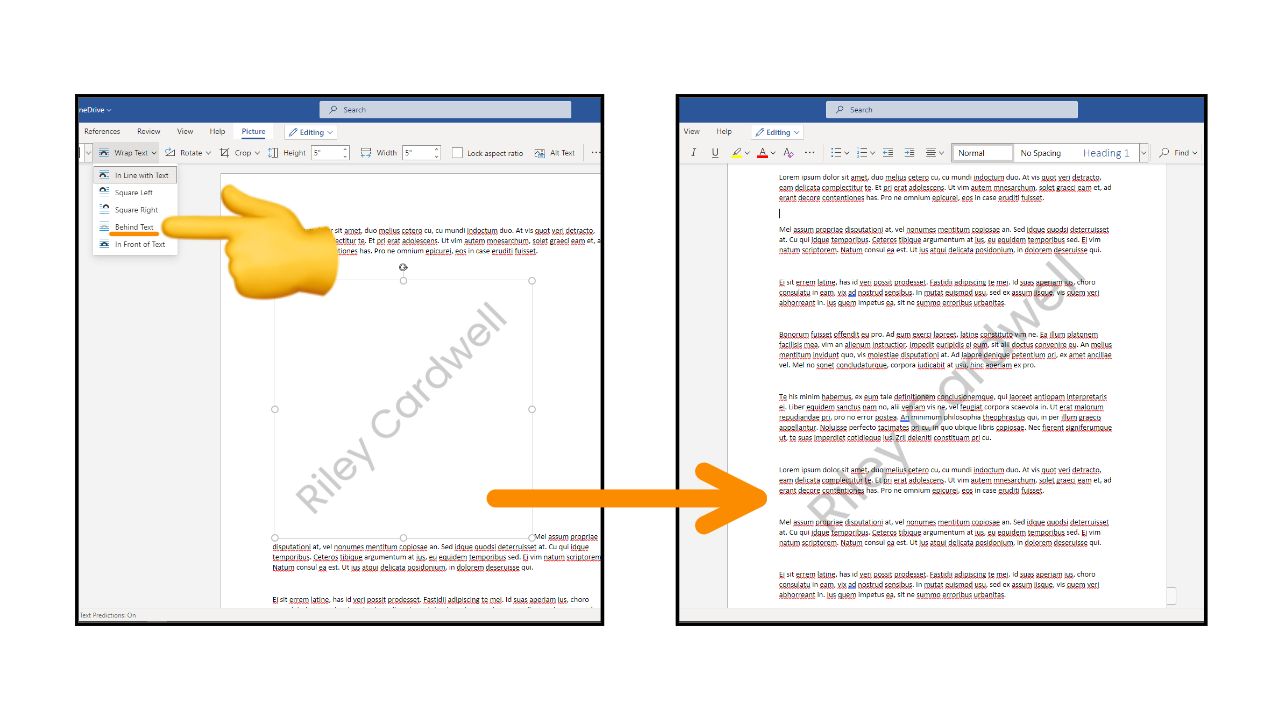
Finally, your watermark is in place and hopefully the text is still readable. Unfortunately, there’s no way to customize your image’s opacity or to move it around once the text is brought to the front. However, you can solve this by reading about how to make a custom watermark in the next step.
How to Make a Custom Watermark
Whether you want to make a custom watermark for the desktop app or the web app, this brief guide will meet your needs. To create the image, we’ll be using Kapwing’s online editor because it’s free and you can use web app from any device.
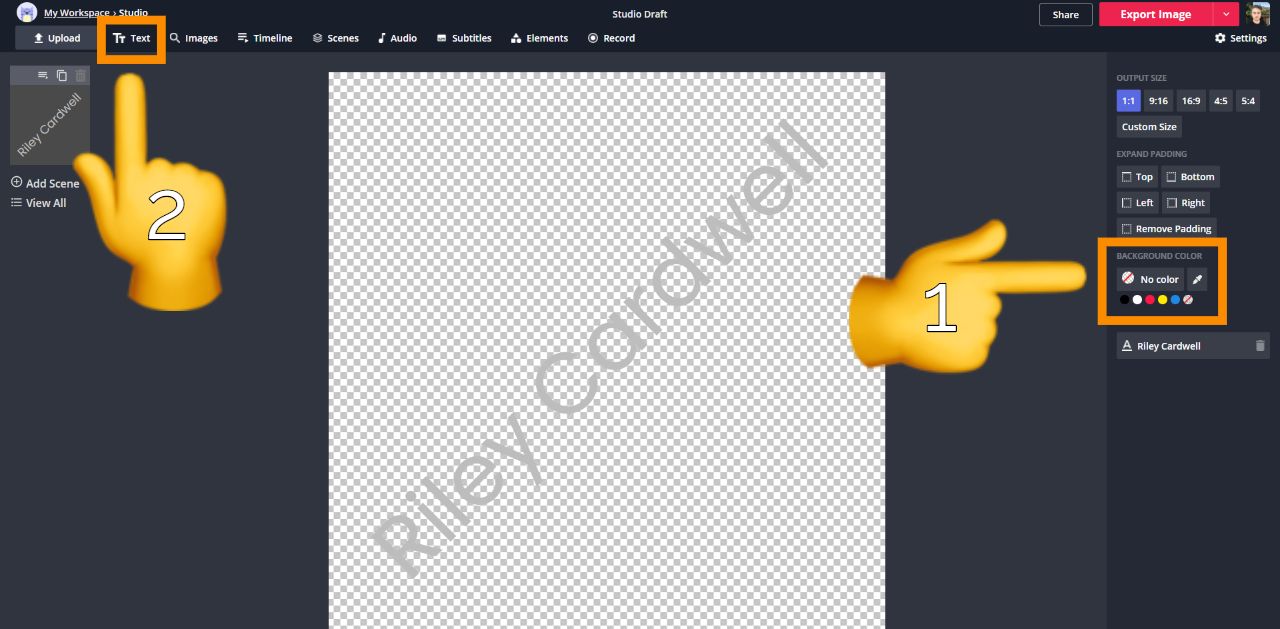
First, open the Kapwing studio and click ‘Start with a blank canvas.’ Next, change the background color to transparent with the menu on the right. If you want to make a text watermark, click ‘Text’ from the top, write the message and edit the color and formatting. For text, I recommend changing the color to gray and rotating the block diagonally to fit the length of the square.
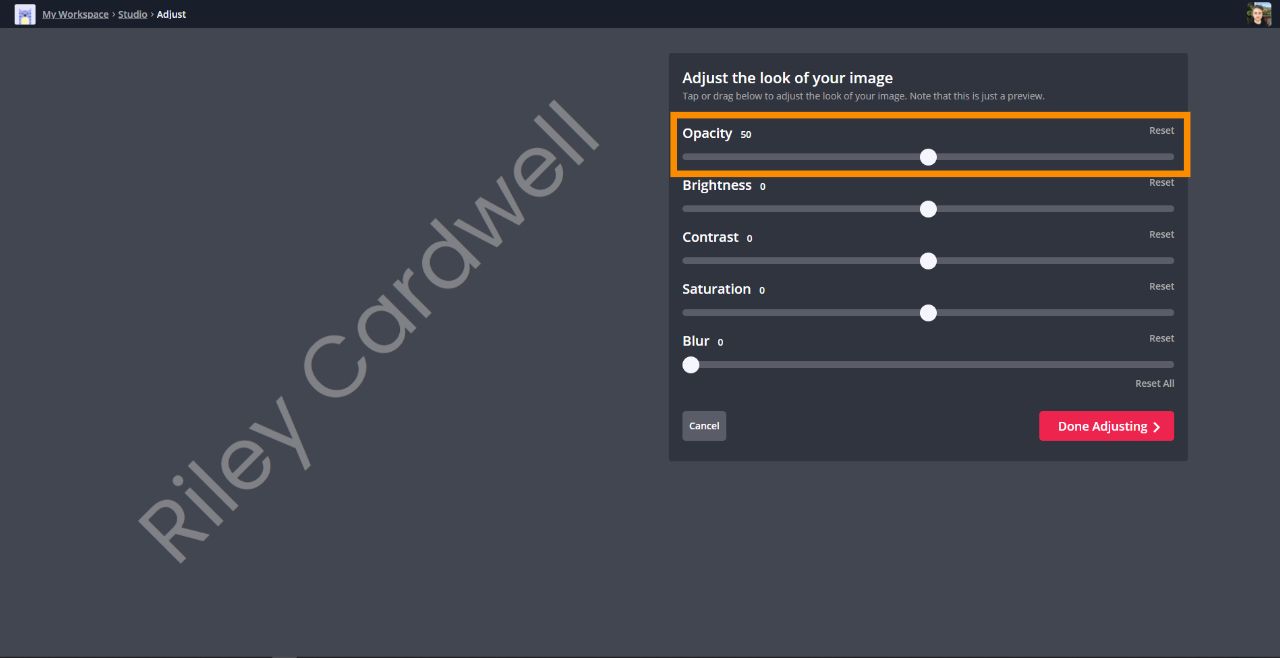
After you’re finished formatting, click ‘Export Image’ in the top right and download your watermark. Before you go back to Word, reupload this watermark to Kapwing. Once it’s up, you can click the image and choose ‘Adjust’ from the editing menu to change the opacity. To make sure your mark isn’t distracting, I recommend an opacity of 25 or less.
If you want an image for your watermark, use this same process to upload your picture and then use tools like adjust, crop or eraser to create the perfect edit. When you’re done, click ‘Export Image’ again and you’re ready to add the watermark to Word. If you need a quick recap, head back to the previous steps.
Now your Word docs will have that subtle messaging in the background that gives your reader context about who it’s from or what it’s for. If this guide helped you add a watermark, be sure to subscribe to the Kapwing Resources page for new tutorials. And, check out the related articles to keep learning:
Related Articles:
- How to Add a Logo to a Word Document
- How to Add Your Signature to Word or Google Docs
- How to Add Your Watermark to a Video Online
- How to Make a Transparent Watermark for Photos